

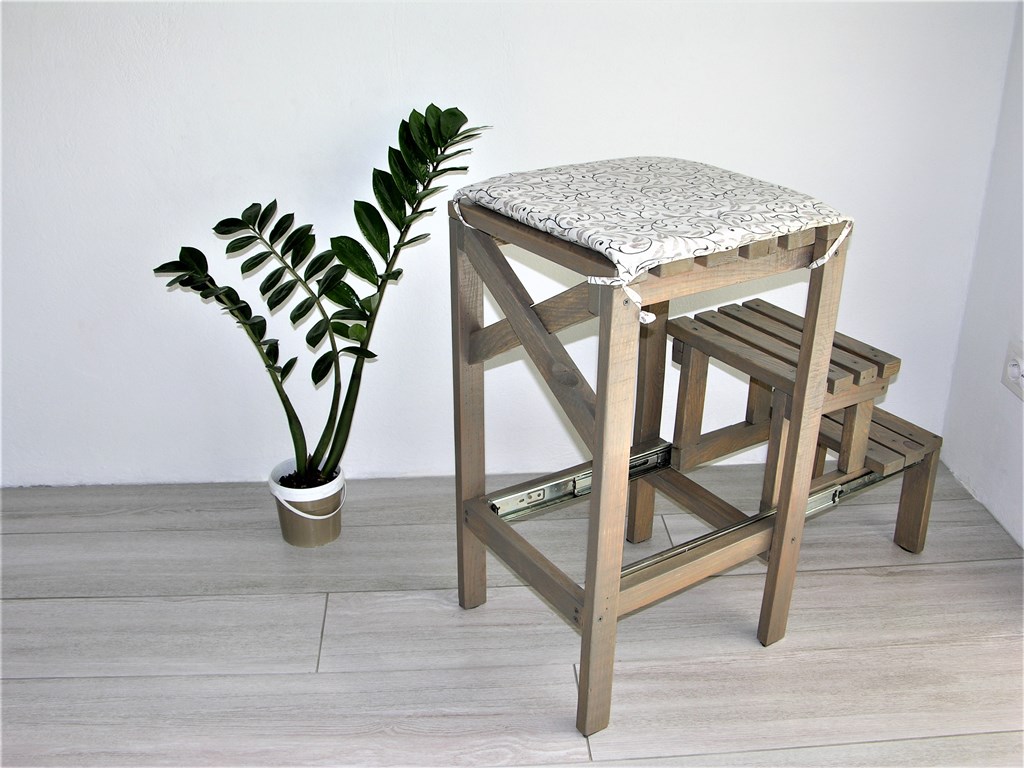
How to safely get to those high cabinets and under-the-ceiling shelves? Here`s an interesting idea!
In the kitchen we don`t have any hanging cabinets. But we have 2 large high built-in cabinets. They can be opened from the floor, but if some kitchen supplies are deep inside then a ladder is needed to get them. So the matter of having a kitchen ladder was very urge.
Pricey at stores
After scrolling down millions of kitchen ladder pictures in the Internet, I`ve found some that I actually liked because they were practical and pretty, but the price mostly was really unaffordable. I`ve been racking my brains over this ladder for more than a year. And suddenly the idea came out of nowhere.
Where do I take lumber
We have some sound panels (timber frames stapled with fabric) left from my hubby`s former sound recording studio. They`re made of dry 2×4 cm screwed together wooden bars, which are just perfect for making furniture (or maybe I am perfect at figuring out how to adjust them for making furniture 😉 ). So I took couple of them and first removed the staples from the wood. Then I disassembled these panels with the help of the drill. After that I sanded the wooden bars with a #180 grit paper (it`s better to sand long bars then cut them and sand).

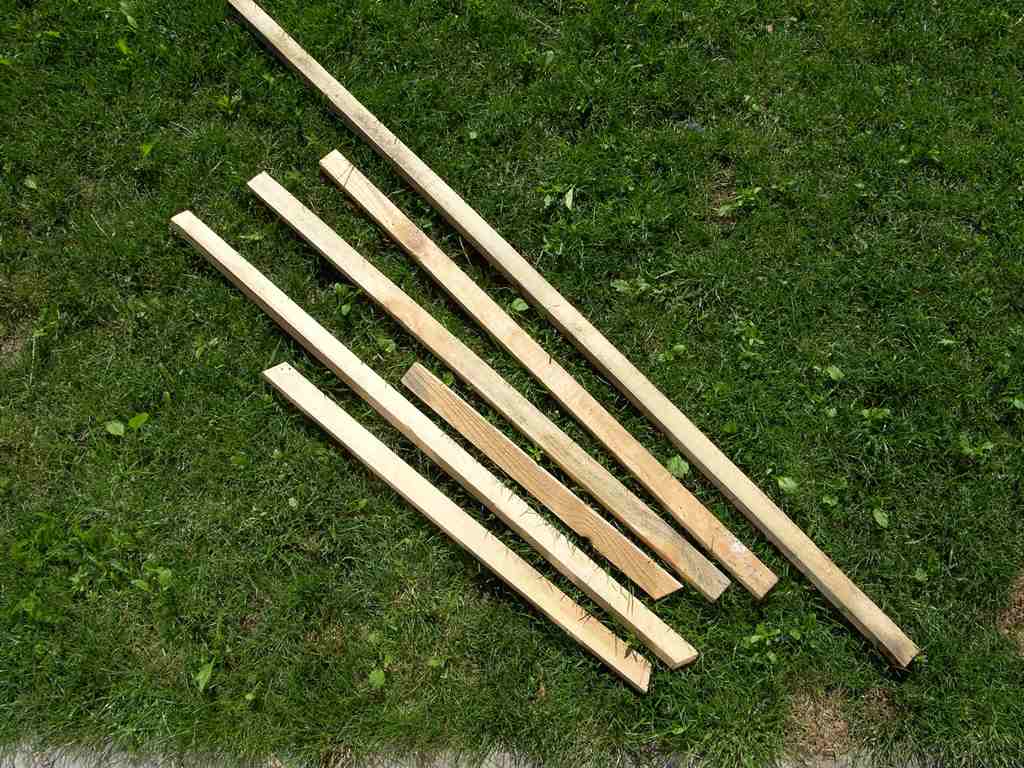
Cut the bars into pieces
We already had the kitchen bar stools so the ladder bar stool`s dimensions were a no brainer. To have minimum leftovers I counted how many and of what length bars I needed, cut them and sanded the ends.

Assemble the stool
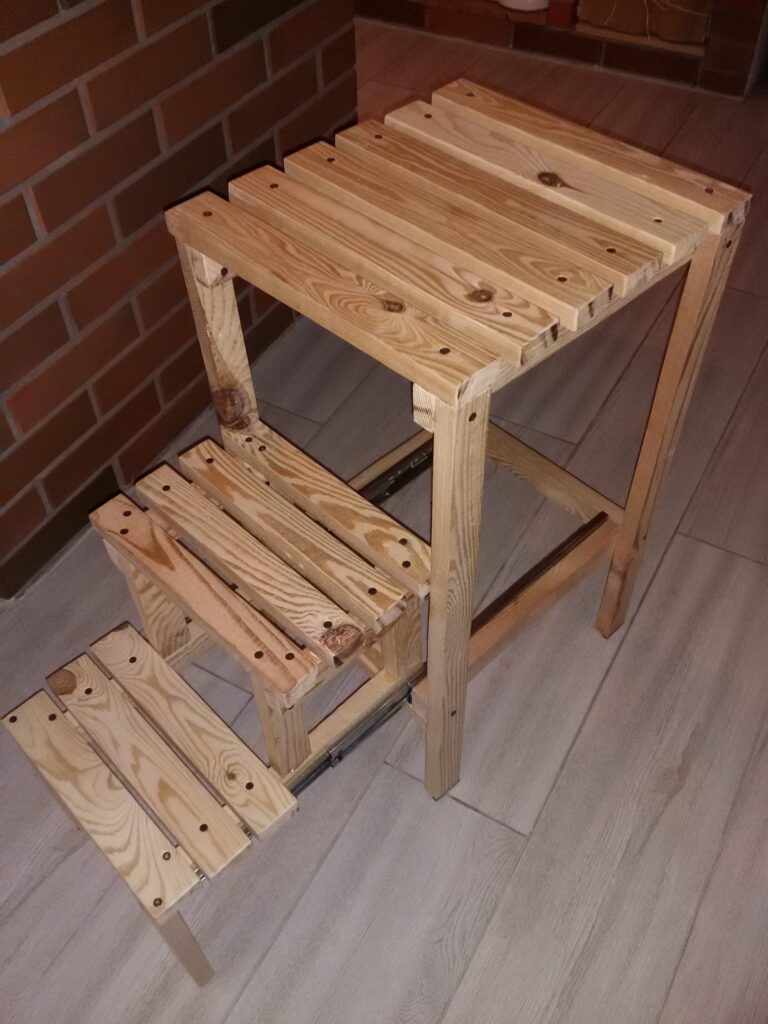
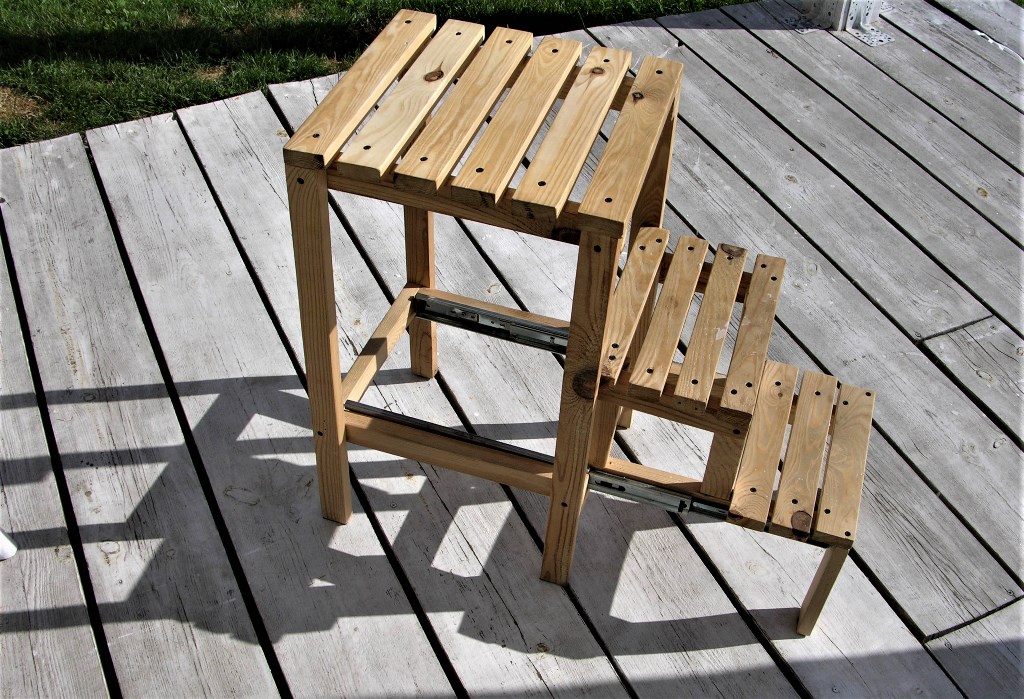
The stool`s height is 85 cm (2 7/8′), the seat is 35×40 cm (1 1/8′ x1 1/4′) and the steps` height is 22 cm (8 5/8″). First I glued and screwed the stool`s and the ladder`s parts together using 41 mm (1-5/8″) screws.
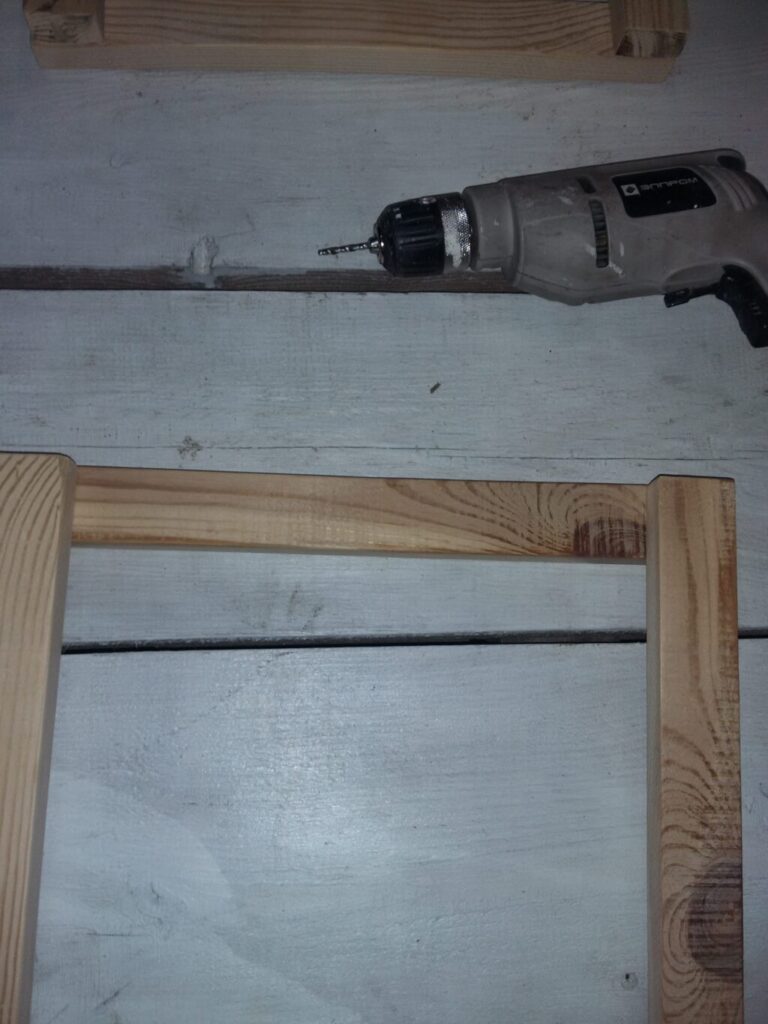
Make pilot holes for the screws
Its better to make pilot holes first with an appropriate drill (here I use 3 mm (1/8″) wide drill), then put glue on the bars and screw them together. If we don`t make pilot holes first, then the wood may split when driving screws in it. Drilling holes allows the threads of the screws to cut into the walls of the hole rather than forcing the wood fibres apart. This creates a stronger connection. Plus, a pilot hole will help the screw to drive in straight.
Here are some photos in the order I assembled the bars:
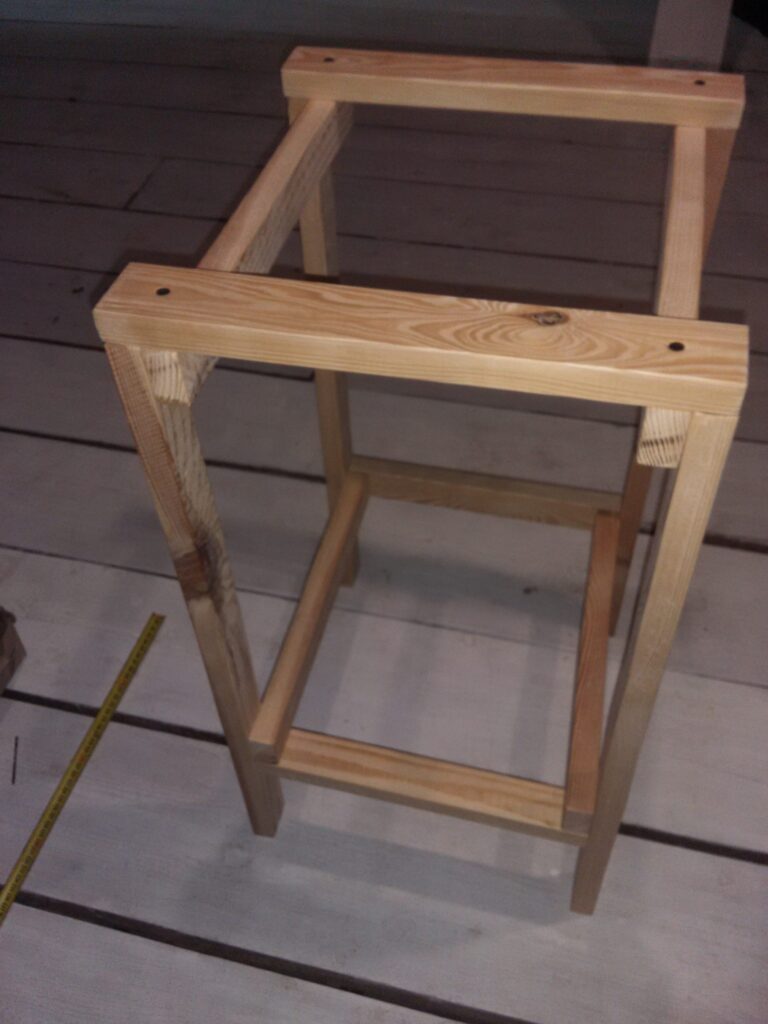

Screw the edge slats first. Then make the edges of the seat and “fill” in the seat with the rest of the bars.

When the glue is dry attach two 25 cm (10″) full extension drawer slides to the inner side of the stool.
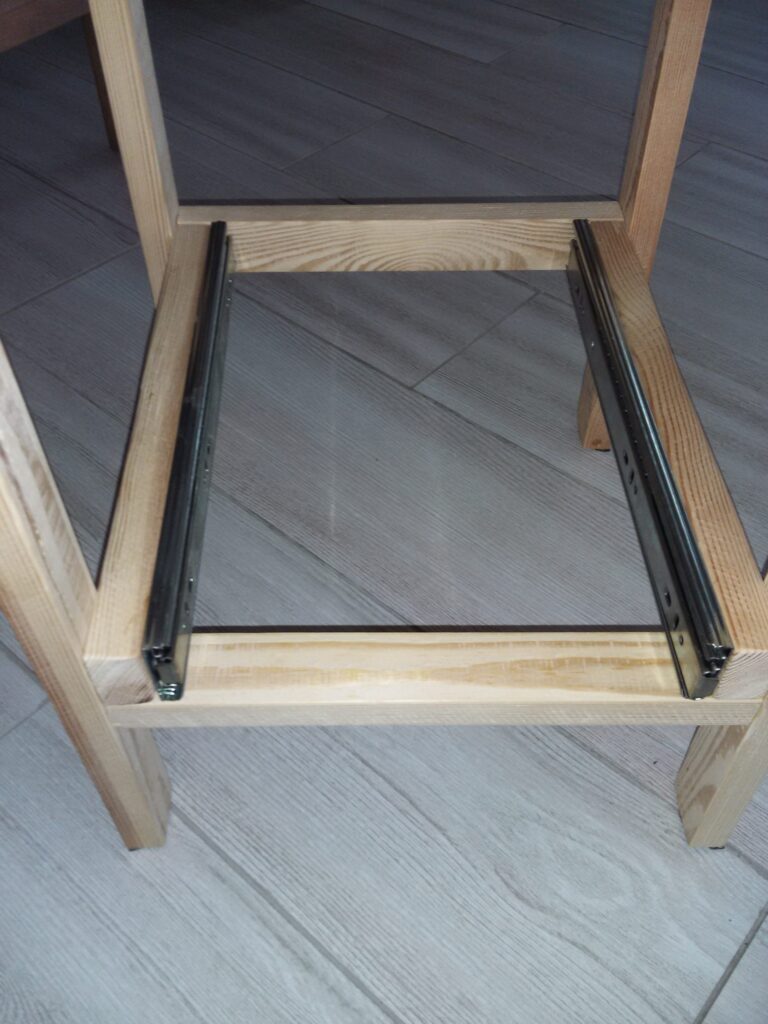
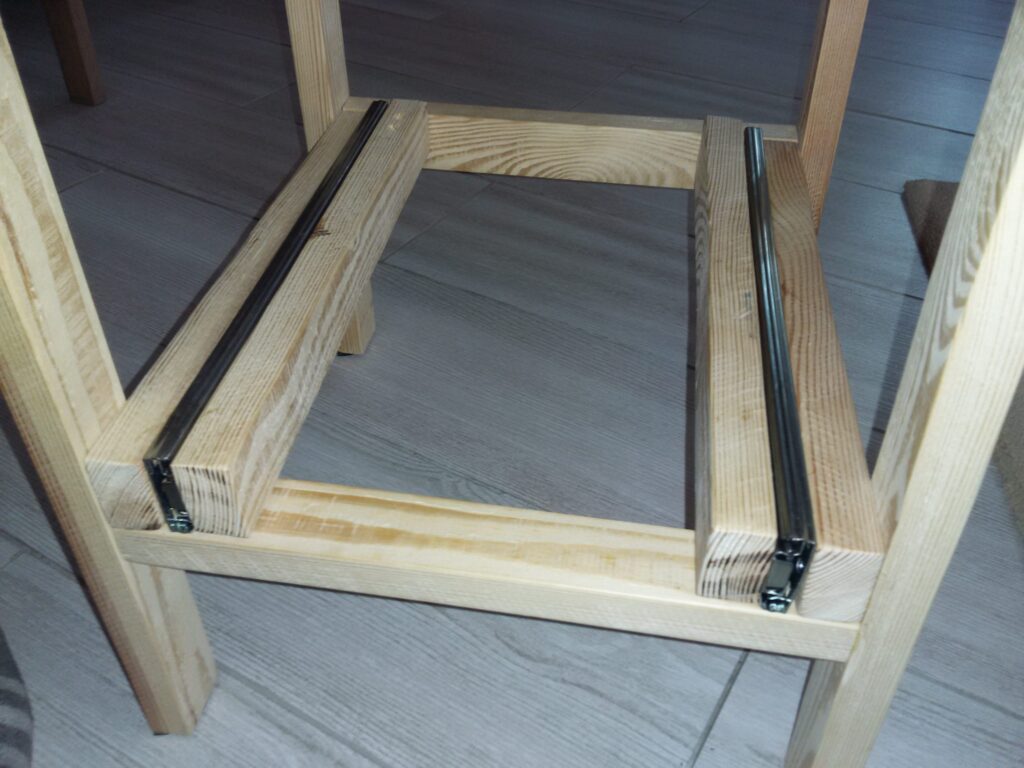
And the other parts of the slides attach to the stool. It`s better to do it with tiny 1 cm (3/8″) screws that come with the drawer slides. The drawer slides should be of a good quality, because you don`t want them to be broken when you step on the ladder. And don`t forget to stick floor protectors (sticky pads) to the legs of the stool.
*Tip: sometimes the legs of a four legs chair or a table turn out to be not levelled precisely (wrong measurements or a saw circle cut gap), which causes the items to wobble. If the joints of the chair or table are strong, this inconvenience could be simply fixed by thick sticking cloth pads underneath their legs.


The Seat
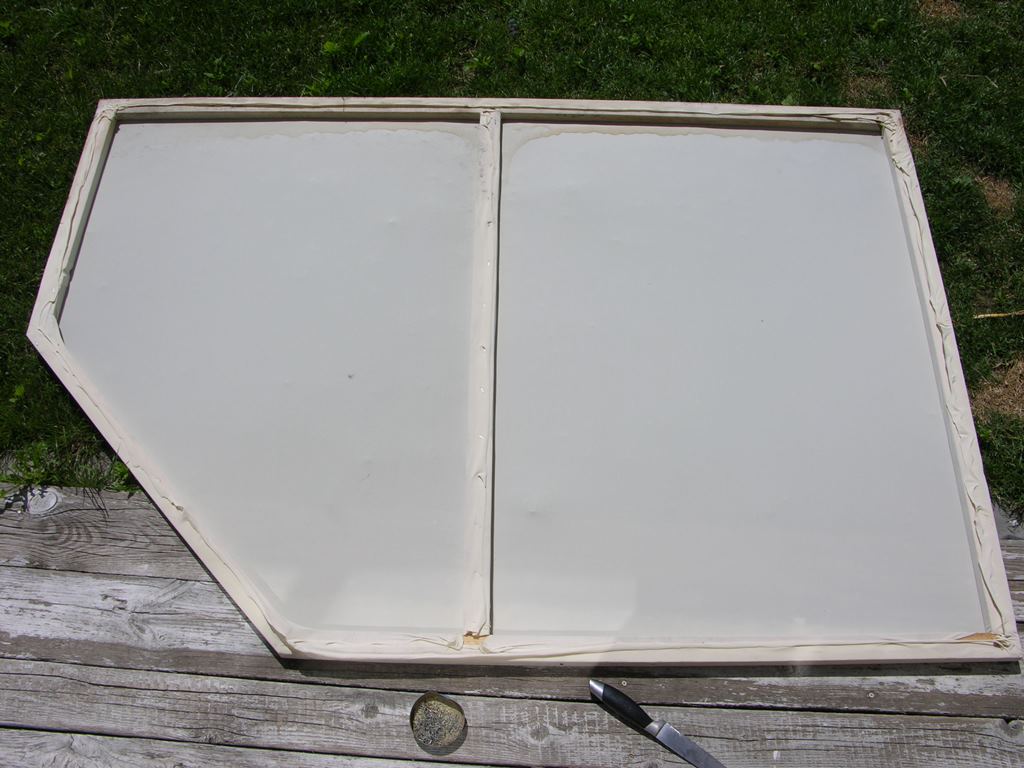
For soft sitting I used an appropriate piece of foam rubber left from my hubb`s previous studio`s panelling. Sewed a pillowcase for it and voila!
I`m planning to polish it in the shade of the kitchen stools some day. It`s very smooth, so I have no problems with its cleaning even though it`s the kids stool and it has seen all kinds of porridge, fruits, chocolate, and other food crumps.
UPDATE: 29/07/20
Finishing touches
It`s time to make a little upgrade to this stool.
First of all I disassembled it (just unscrewed the ball-bearing slides). And then sanded slightly.

X-cross side stretcher
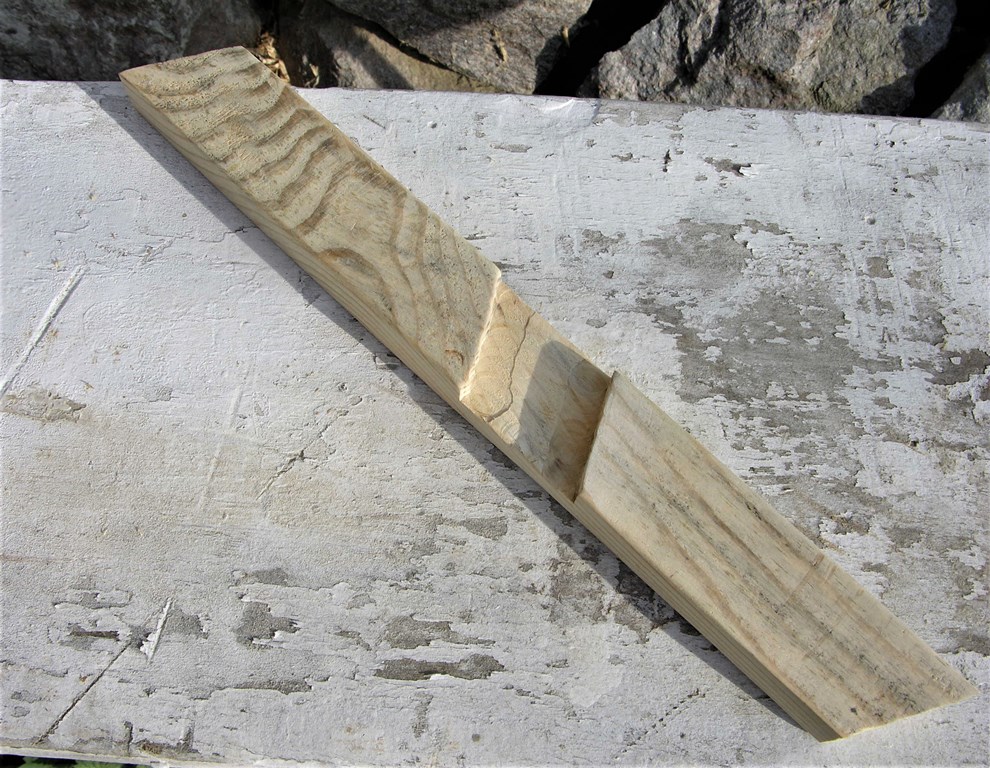
It`s strong enough but to make it more reliable for large fellows, you can make an X-cross side stretcher to strengthen the stool`s legs. Measure the desirable (mine is 25 cm or 9 27/32″) equal distances from the bottom of the seat down along the legs and mark them. Then just place one of the 2×4 into its position so that its bottom goes through the mark on the leg. Draw a straight line where the piece of wood should be cut. Cut it. When you have one side cut, put the wood in its place and draw a line on its bottom. Cut the wood. Then do the same with the other 2×4.

*Putting the wood pieces in their place, drawing lines and cutting – making it all consistently allows you to escape the measuring tape and mitigate the variances.
I also made a cut in the middle of the outer lath to fit the inner one in. To make the cut I fitted these slats into their position and simply marked the cut. It didn`t turn out very precise but with glue the joint is going to be strong enough. How I make cuts in the wood with a router (or other tools) I`m telling in this post.

Why glue is enough to fasten the x0cross side stretcher
Apply a carpenter`s glue on the unpainted surface of the slats (it is important to stick everything together before painting so the adhesive could penetrate deep into the wood and create a strong bond). Once, I was making a shelf for the kid`s toy cars and glued one of the stretchers to a wrong place. Not only was it arduous to tear it off, what`s more, the glued wood fibre was ripped out of the other slat. Therefore, we can say that using a wood glue is a reliable way to adhere wood to wood.
Now it`s time for painting it all (along with other woodworks).

And reassembling it all.
I`d be glad to hear some feedback on this simple-to-make ladder bar stool.
