
My family and I prefer built-in closets, cabinets and even built-in pull-out shelves 😆 . This way they seem to take up less space and it`s more convenient to keep it dustless – at least one unused surface (tops of cupboards, fridges, wardrobes etc.) is excluded. So, when planning the guest bathroom, with the help of three narrow brick walls we made three niches: for bath shelves, for a corner washbasin and for the fridge on the other side. And of course the huge place above the refrigerator was empty, useless and that part of the kitchen seemed unaccomplished.
A small pantry above the fridge
So, I`ve decided to make a small pantry cabinet there. The fridge is about 180 cm (6′) high and 60 cm (2′) deep, therefore I will make only one additional shelf in it and I`m going to need the step stool.

The top of the fridge cannot be used as a regular shelf. I knew that someday there would be some shelf, so we left iron bars sticking out of the wall. I`m going to attach scrap wood from the sound panels to them and, using this wood as rails, put planked wood pieces on them.

Disassembling the Sound Panels 
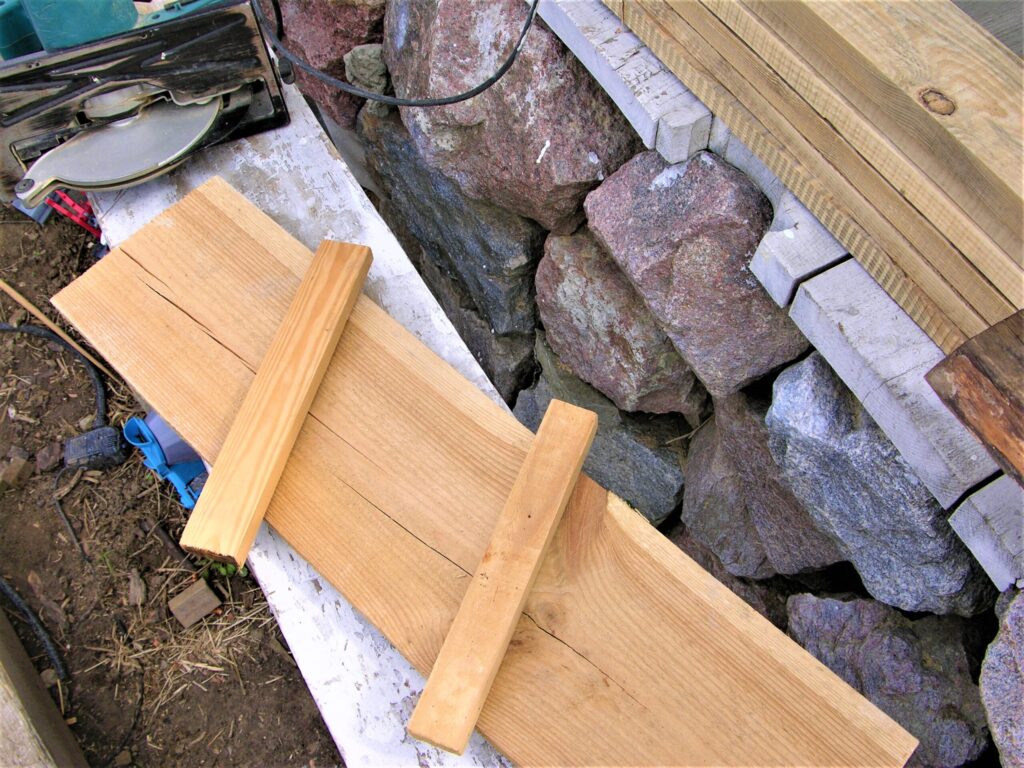
Side Bars for the Lower Shelf 
Side Bars Attached to the Wall


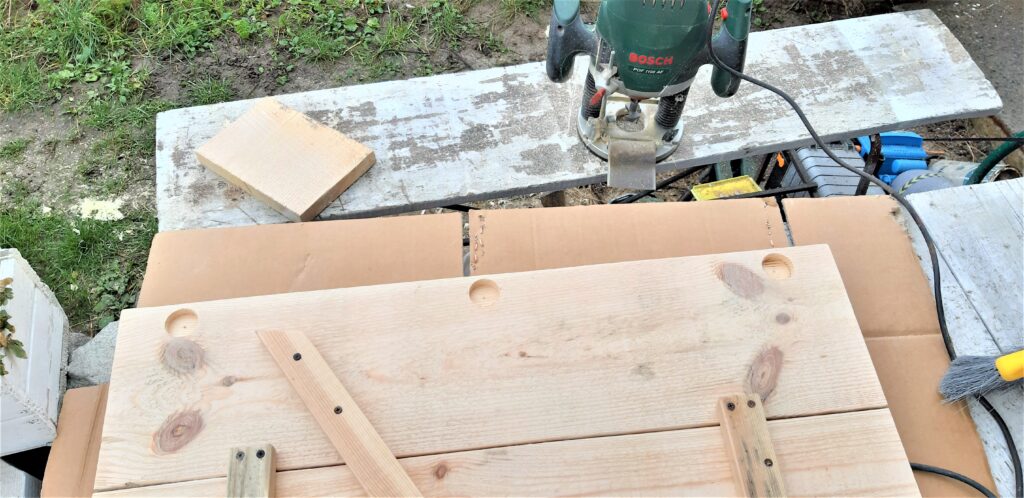
So, I disassembled another sound panel, sanded the bars, cut them into needed pieces 60 cm (2′) each. Taking into account that the shelf would be behind the cabinet door, the rails should be shorter than the recess’s depth.
I measured the distance between the iron bars in the wall and made relevant but a little bit thicker holes in the wooden bars and just hammered the bars to the wall. I could`ve put them on dowels but they stuck quite firmly, besides there would be no side pressure that could tear the bars off the wall.
Then I just put some planked wood on these rails, screwed some of them to the rails to make sure the rails definitely stay hooked on the iron bars.
*Important: Make sure to leave some ventilation aperture in the lower shelf for the hot air from the fridge.
Upper shelf
There was one about 30 cm (1′) wide wooden plank among the leftovers, which was more than enough for the upper shelf depth because it`s about 240 cm (8′) away from the floor and even the ladder stool wouldn`t have helped to get something from the depth of that “stratosphere” shelf if I had made it full depth.
I attached two bars on each side of this plank with screws because I was planning to hang it with dowels. But when putting it in its place I needed a hammer, so I decided that it wouldn`t move anywhere, just in case attached two angle brackets to the far wall. And the front edge of the shelf is additionally supported by a self-made oven trays organizer.

Empty Cabinet 
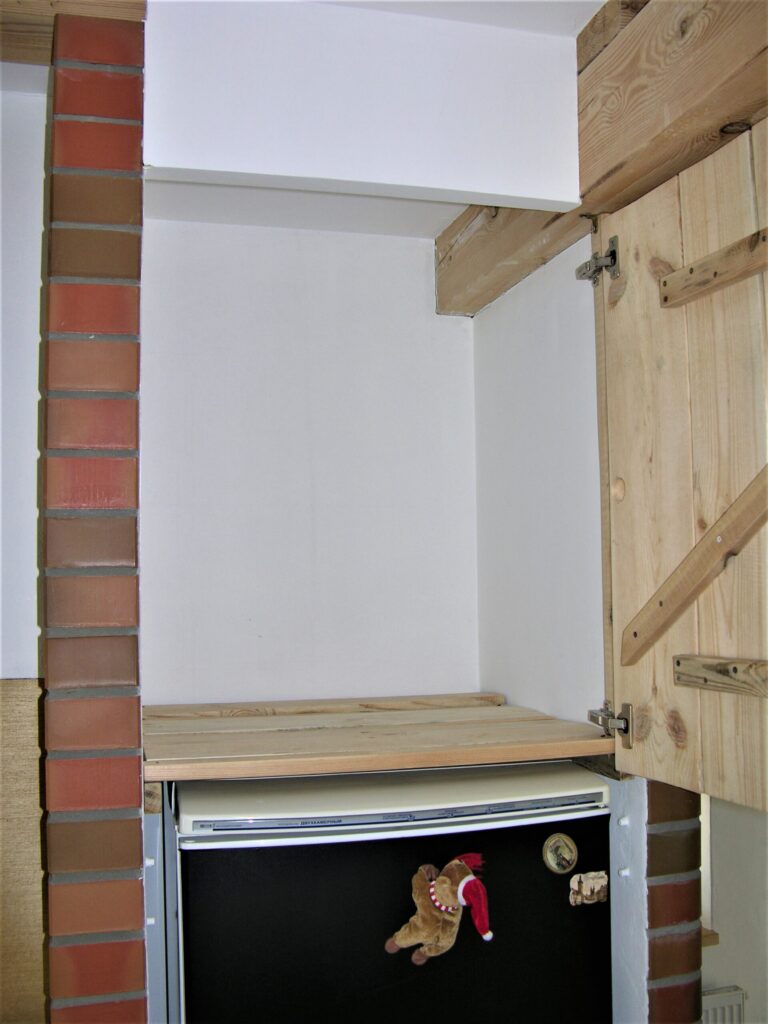
Cabinet with a Shelf 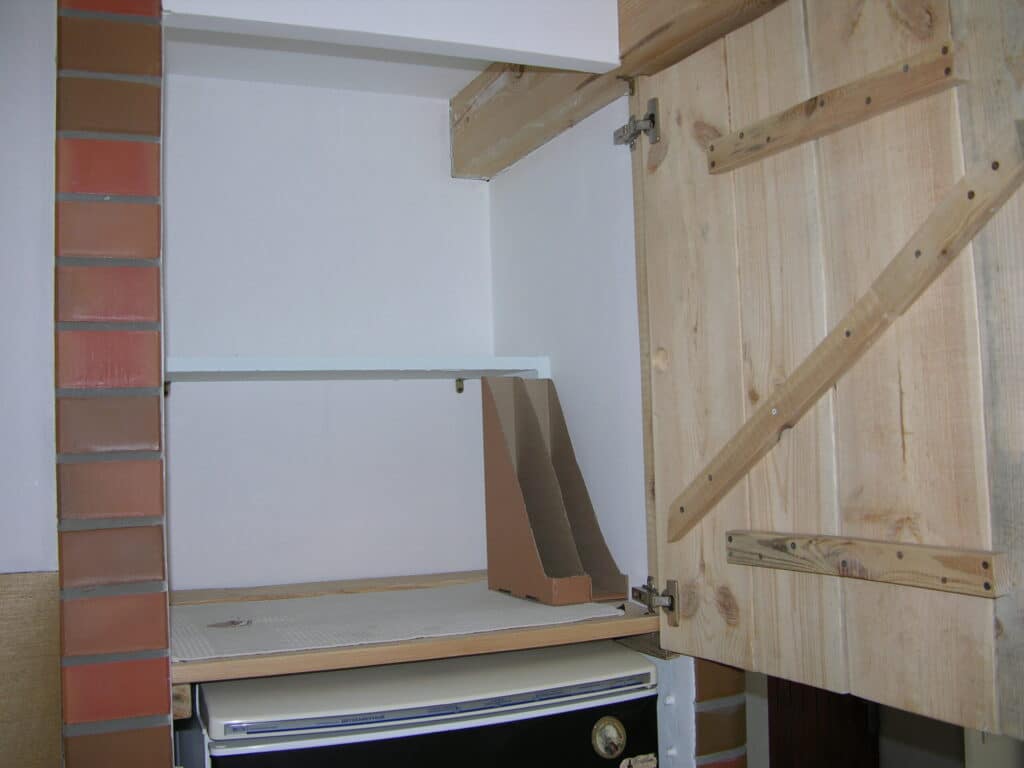
Shelf supported by a DIY Oven Pans Organizer

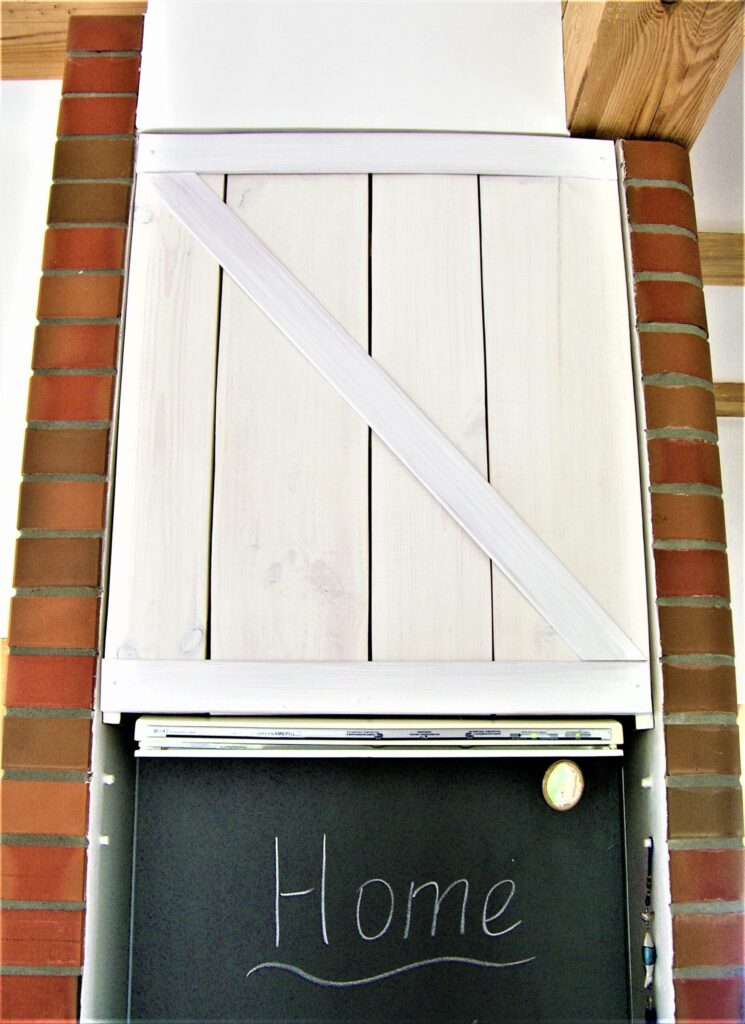
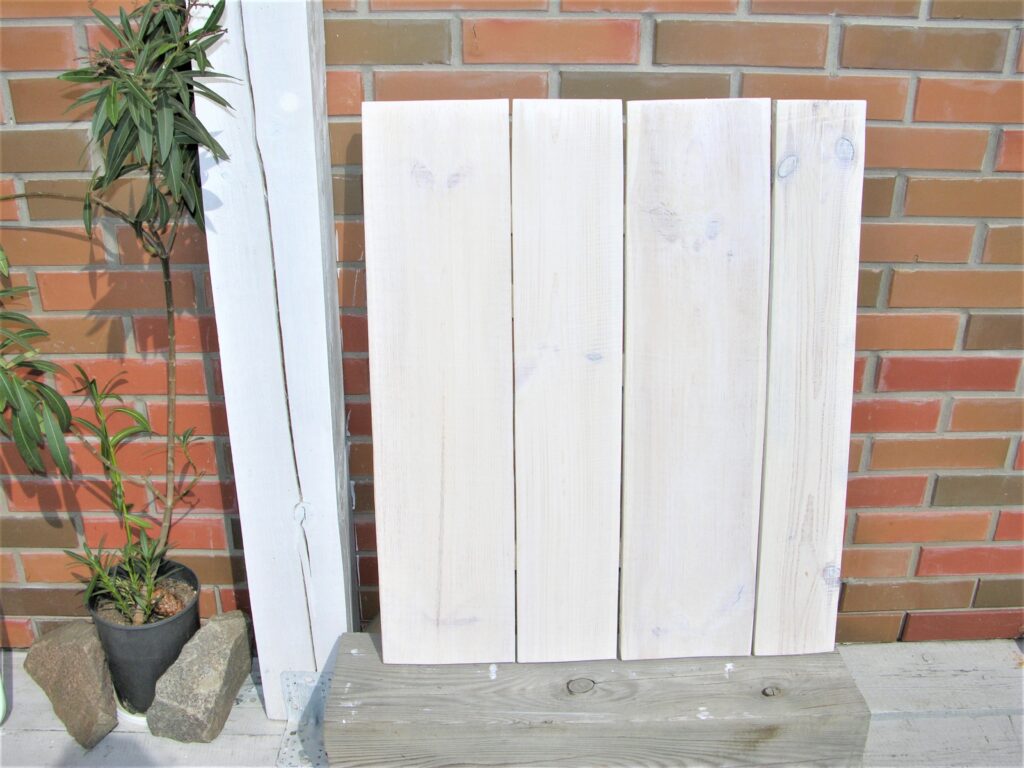
Cabinet barn door
I found these among other leftovers. Altogether in a raw they fit best to the opening above the fridge. To attach these planked wood pieces together I`m going to use the same bars from the sound panels.

Starting with drying, because the wood is going to get smaller due to the high temperature above the fridge. Eventually there are going to be large gaps if the wood is not dry enough.
Then sanding and painting.
Painted Cabinet Door 
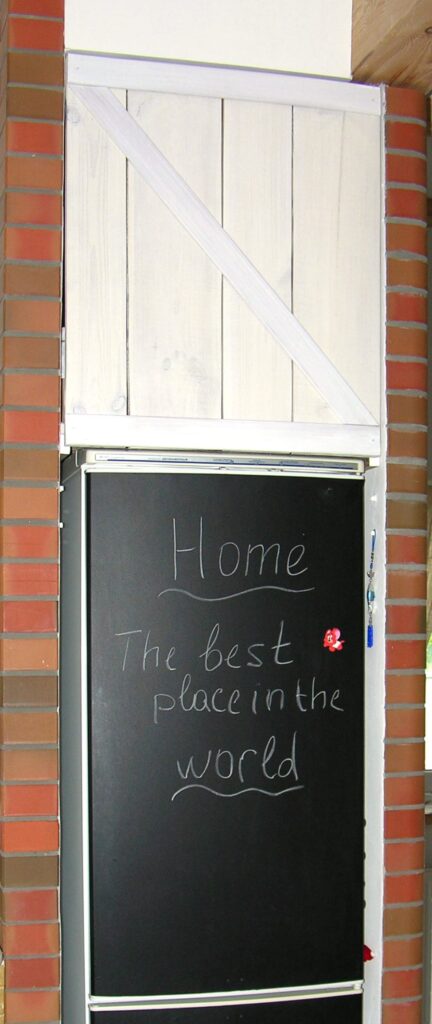
Painted & decorated with thin Planks to make a Barn Look Cabinet Door


Then I took some door trim leftovers, cut them, painted white and attached to the cabinet door with half inch screws. They are just for getting the barn look.
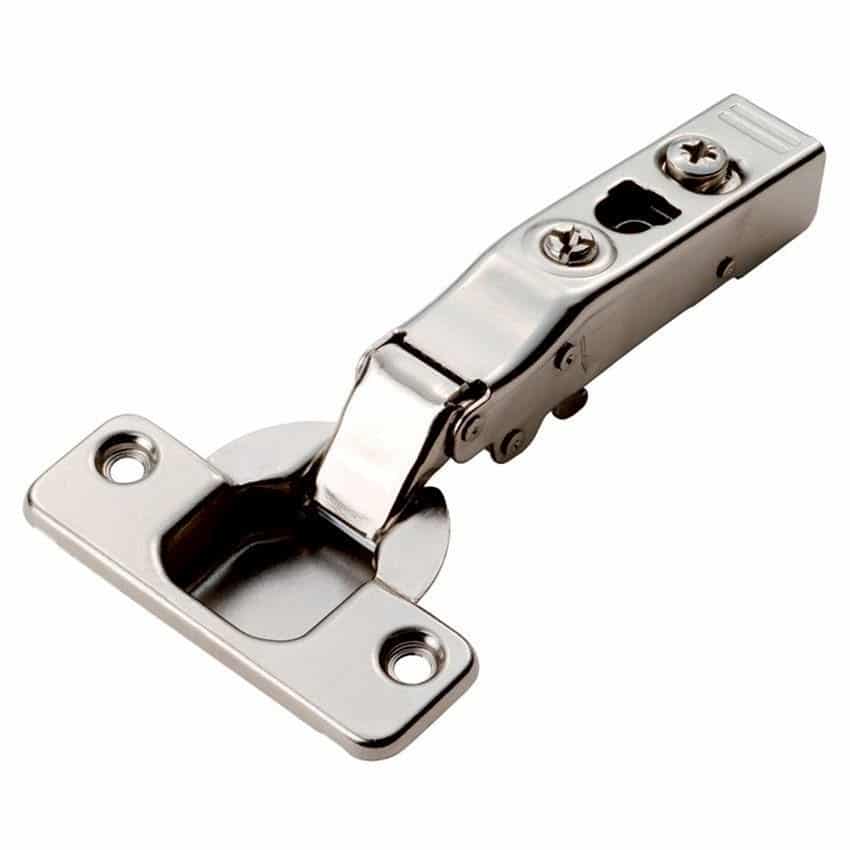
To hang this cabinet barn door I used such soft close hinges for frameless cabinets. Try to choose high quality soft close hinges, they may be a bit more expensive, but they will serve you well and softly 🙂
To make holes for this hinges I used a router, but it can be simply done with a drill and a 35mm (1 3/8″) concealed hinge bit. Then placed the hinges into the hole. If everything had been done right, then they should easily drop into place. Make sure the soft close hinge is squarely in place, and flush with the top of the cabinet door. Once it is aligned properly, you can fasten it into place using the small wood screws that are included with the soft close hinges.
The next step was to install a mounting place onto the cabinet, which is not quite a cabinet because its walls are made of bricks and it`s really hard to attach something to them. That`s why I took one 2×4 2′ long bar and simply screwed it to the beam (at the top) and to the lower shelf (at the bottom) with corner brackets. Then screwed the “clip-on” mounting plate to this bar. It`s called “clip-on” because after installation, the cabinet door clips onto the mounting plate. That`s what I did. Slided the soft close hinge into the mounting plate, and then pushed it into the plate to clip it into place. Luckily my hub was there to help.

Whew 🙂
P.S. The temperature in this pantry will be a bit higher, so it`s better to use it for temperature rigid supplies i.e. grains, oven trays, dishes etc.
I`d really appreciate if you drop a line in the comments about your ideas on how to arrange that awkward place above the fridge!
