

About fifteen years ago, when I was still wet behind the ears, I started a little business, assuming that the business success is all about a genuine smile and a smart outfit. So I`d rented a fancy office and filled it with all the fancy attributes, including this steam coffee maker (seriously, in some businesses a cup of redolent coffee is the key 😉 ).
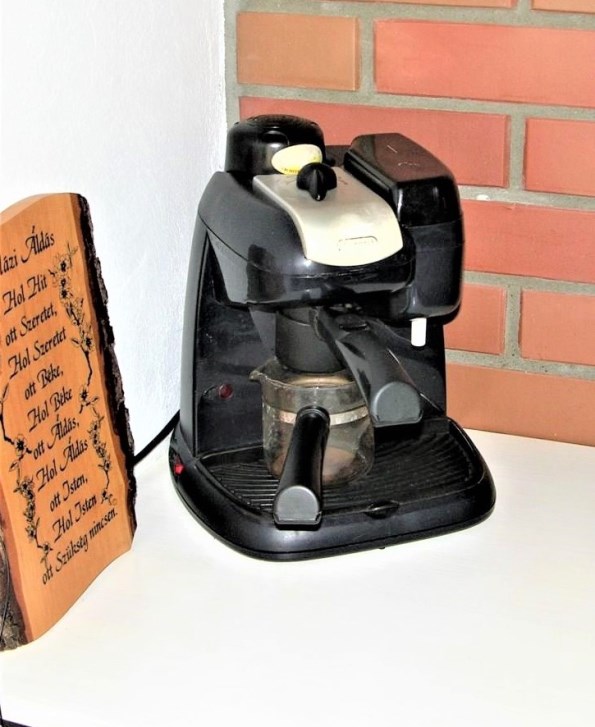
Few years ago, when we moved in this house, having a regular rummage around my parents` attic for some useful stuff, I found it. It is old, of some nondescript dark navy blue and grey colours, but – it makes cappuccino! It definitely needed a refresh.
How to paint a coffee maker
I didn`t want to paint the whole machine, thought the paint wouldn`t last long, especially with those temperature and moisture fluctuations and my passion for scrubbing the dirt out of the paint. So, I decided to change only the grey colour at the top and to add some contrast at the bottom, cut a long story short – to paint it white.
Hunting through the spray paint shelves in the hardware shop, I stumbled upon some paint labels that clearly said “for home appliances”. Actually spent some time exploring those shelves and discovered that nowadays there are paints for literally everything! Don`t know if they`re just decanting the same paint into differently labelled spray cans 😆 but for this project the paint I found has been working well now for more than several years.
The process
First things first – safety!
* Important! Please read and abide by all the safety precautions written on the label before painting. And don’t forget to unplug the kitchen appliances before any manipulations.
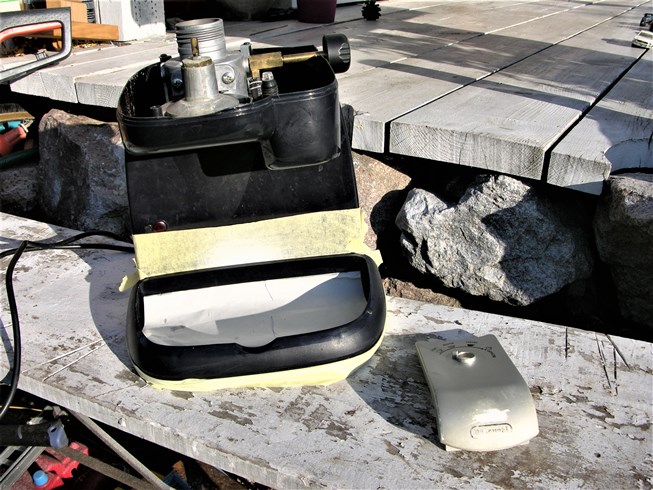
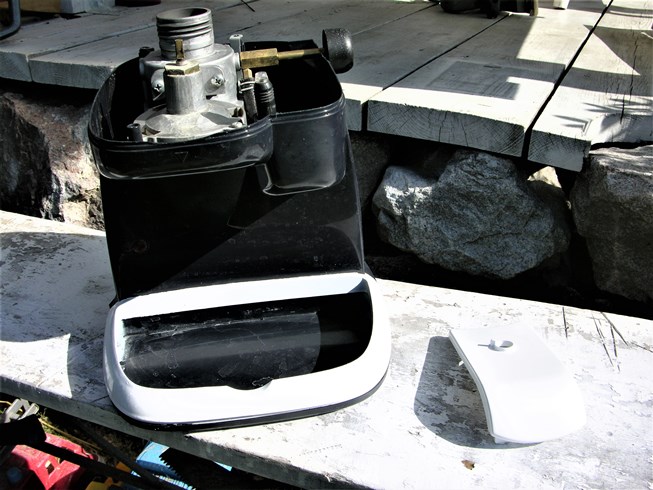
After washing the whole coffee maker, I screwed off the top of it so to paint only that particular grey part.
The bottom part is monolithic, so I unscrewed everything I could, then placed masking tape covering the nearest to those to be painted areas.
* Tip: those spray can projects get really messy; I do those exceptionally outside, preferably on the grass, using a sawhorse to suspend the item. In this case, I had better covered the whole area of the coffee maker that was not to be painted, because the tiny spatters were all around the frame. Had to remove them with a paint thinner immediately after painting. Here are some almost odourless paint thinners: a smaller one for those, who don`t use it often; a bigger one for DIY beginners; and a 3,8L (128 Oz) jerrycan one for eager DIY-ers.
* Tip: if the appliances` body surfaces are slick and glossy, it`d be better to give those a little sanding to make a stronger bond between the surface and the paint, and not to forget to wipe away all of the dust from the surface before painting (vacuuming is preferable).
Spray painting
Years ago, when I was spray painting, the result used to be awkward, with those paint drips and ugly touch up paint blobs. The more I was painting the same area, the thicker the paint coat was, the worse it became. Moreover, sometimes the thick paint coat just peeled off.
The solution of this problem was as simple as following the label instructions – hold the can about 30 cm (12″) away from the object and apply several thin coats instead of one heavy, and, apply a primer if necessary. It`s not that time consuming, because for most of the spray can paints it takes 15-25 minutes, maximum an hour (depending on the temperature and humidity) to dry.
So, I applied 3 coats to make a smooth and neat white surface, waiting with patience for each coat to dry completely.
The next day I removed the masking tape, assembled the coffee maker. And, after three clean water rinse cycles (running plain water through the coffee machine – as if making coffee, just without the grounds), enjoyed my cappuccino on the back porch 😎 .

How to extend a coffee machine`s lifespan
Choose a manual coffee machine from a trustworthy manufacturer
Even being an eager coffee consumer, I still prefer manual coffee machines made by reliable coffee machine manufacturing companies. The best thing about them is simplicity – there`re not many parts which could be broken within. And of course, they are mostly inexpensive.
This post contains affiliate links. For more information, see my disclosures here.
I`m not an expert in coffee brewing, but more into design and a good strong espresso, which, seriously, can be as simple as 3 teaspoons of ground coffee + 500 ml (18 fl oz.) water boiled in any vessel (enamelware preferable). But so not to spit out or swallow the rests of ground coffee, some crafty guys invented coffee makers and, eventually, coffee machines. Some of them can be true pieces of art, still budget friendly, like these vintage style coffee machines, priced under 300$ :


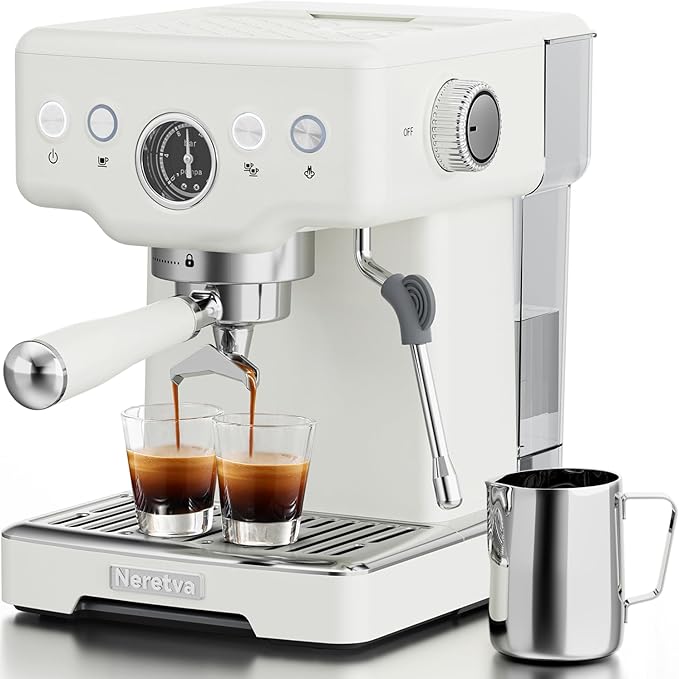
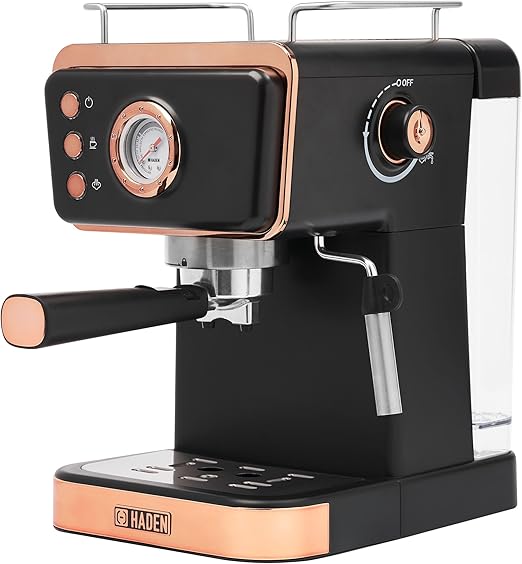


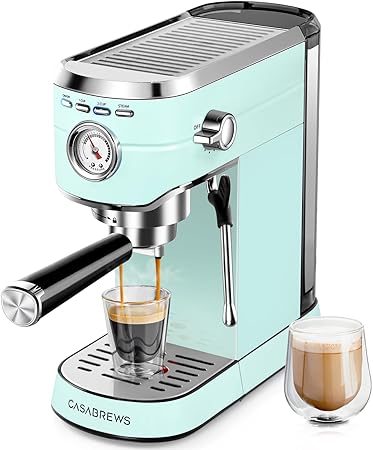
Budget-friendly Retro style coffee machines
Coffee maker maintenance
Wiping off dust and coffee drips are a no-brainer. But sometimes, because of the quality of the water we use, or, in order to restart the coffee machines that have been idle for some time, our coffee makers require a deep cleaning.
How to unclog a coffee maker
In a while our new old coffee maker just stopped brewing coffee. It was heating the water in the reservoir, but probably the tubes and shower head were clogged by mineral build-ups from our water (we use a filter, but still the water related kitchen appliances, the sink, sanitary ware and bath need some descaling maintenance).
Cleaning the filters
First of all I unscrewed the metal filter under the shower head. It looked like this.

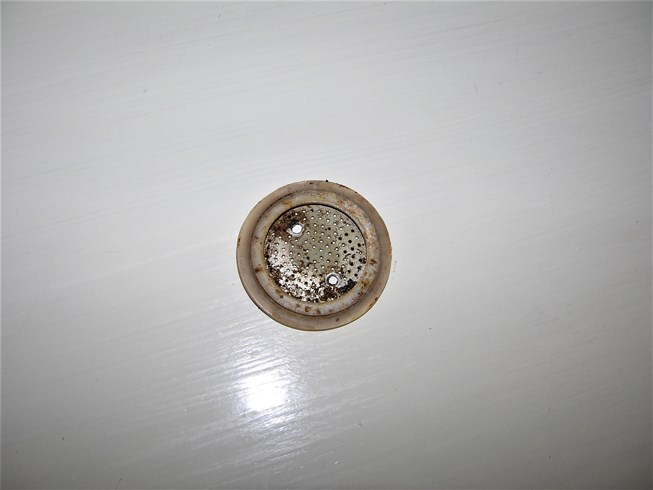
Put it in a citric acid solution for about 10 minutes and cleaned it with a brush. Then screwed it back on its place because without it the water splatters all around when coming out of the shower head.
Descaling
Everyone on the internet offers vinegar for removing limescale. But. . . if you ever tried to heat vinegar, you know that it becomes nearly impossible to breathe from that pungent smell in the room where the cleaning performance is held.
I prefer citric acid. It`s quite a strong acid, and one should be careful with using it on the heating element. I tested it on our water heater and decided to give it a try with the coffee machine. Besides, had nothing to lose, it was old anyway.
As the water was still in the reservoir, for the sake of safety I turned the machine off and let the water cool down a bit. Then took off the cap and poured about four teaspoons of citric acid (for a 0.5l or 1pt of water) into the tank. Emptied the handle filter holder (there was some ground coffee), placed it back and turned the machine on.
The number of brewing cycles with the citric acid depends on how much limescale there in the coffee maker is. And I wouldn`t recommend to make a more concentrated citric acid solution. First, it may damage the heating element. And, secondly, the solution becomes thick and sticky, and, instead of helping, it blocks the apertures and the tubes.
Then I ran a couple of cycles with plain water to wash the citric acid out of the coffee maker.
Then again, unscrewed and rinsed the shower head filter. Screwed it back and washed the decanter.
And finally enjoyed my aromatic espresso.
And because sometimes it’s just easier to see things than to imagine them, I filmed a little video on how I descale a De’Longhi coffee machine (it`s a bean to cup coffee machine, not a drip coffee maker). No vinegar gas mask required, promise. You’ll see exactly how it works step by step. If you’d like to follow along with me, grab your cup and take a peek:
How often to use descale cleaning?
It depends on water hardness and on the usage frequency of the coffee maker. Descaling is recommended as soon as the machine lowers its original performances. Drinking coffee daily, I do this procedure about once every two months.
Use soft water, clean and descale your coffee maker regularly and it will be delighting you with your flavourful coffee for a long time 🙂 .

Your ability to simplify complex ideas is amazing.
I will immediately take hold of your rss as I can not find your email subscription link or e-newsletter service. Do you’ve any?
Kindly permit me know so that I may subscribe. Thanks.
Howdy! This is kind of off topic but I need some guidance from an established blogger.
Is it very hard to set up your own blog? I’m not very technical but I can figure things out pretty quickly. I’m thinking about setting up my own but I’m not sure
where to begin. Do you have any tips or suggestions? Many thanks
Hi there it’s me, I am also visiting this website regularly, this web page is actually
pleasant and the users are really sharing nice thoughts: https://www.cureus.com/users/797747-shirley-n-nordberg
I’m not that much of a online reader to be honest but your sites really nice, keep it up!
I’ll go ahead and bookmark your site tto come back down the road.
All tthe best https://Zeleniymis.Com.ua/
I do not even know how I ended up here, butt I thought this post was great.
I do not know whho youu are but definitely you’re
going too a faamous blogger if you are not already ;
) Cheers! https://odessaforum.Biz.ua/