

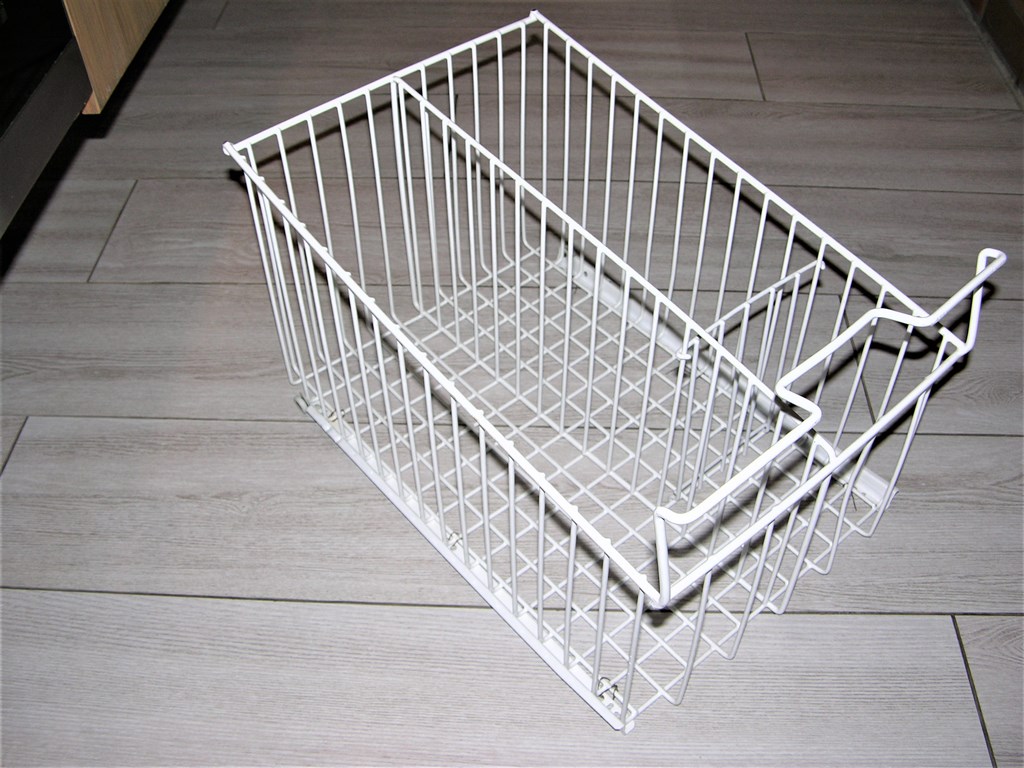
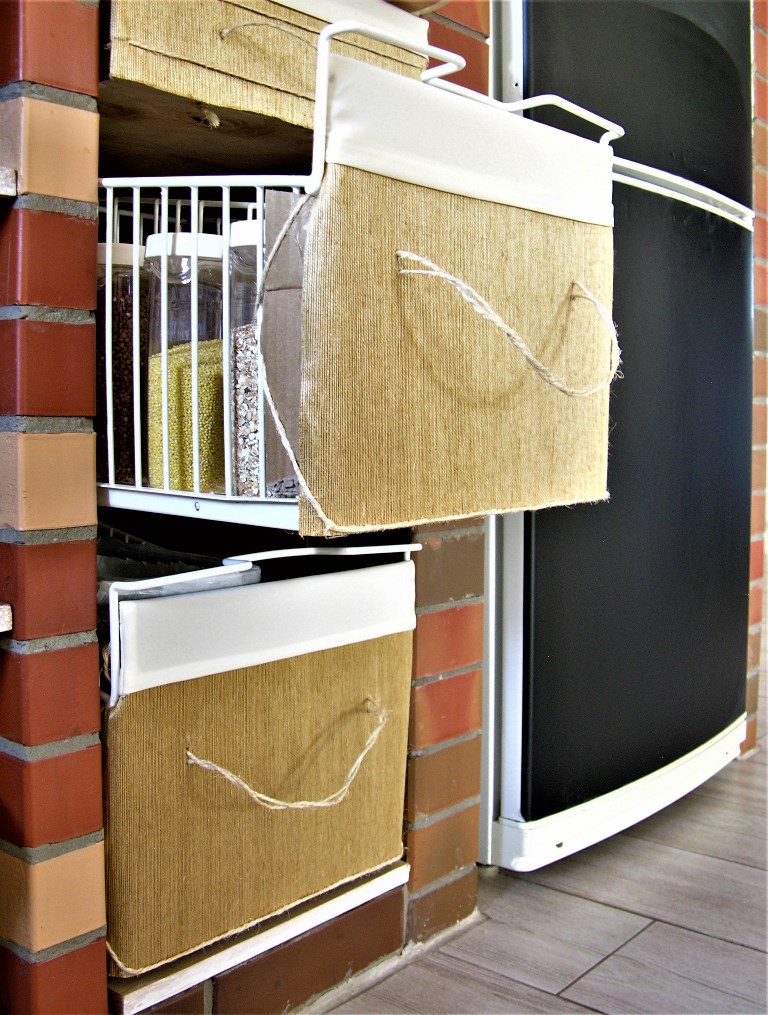
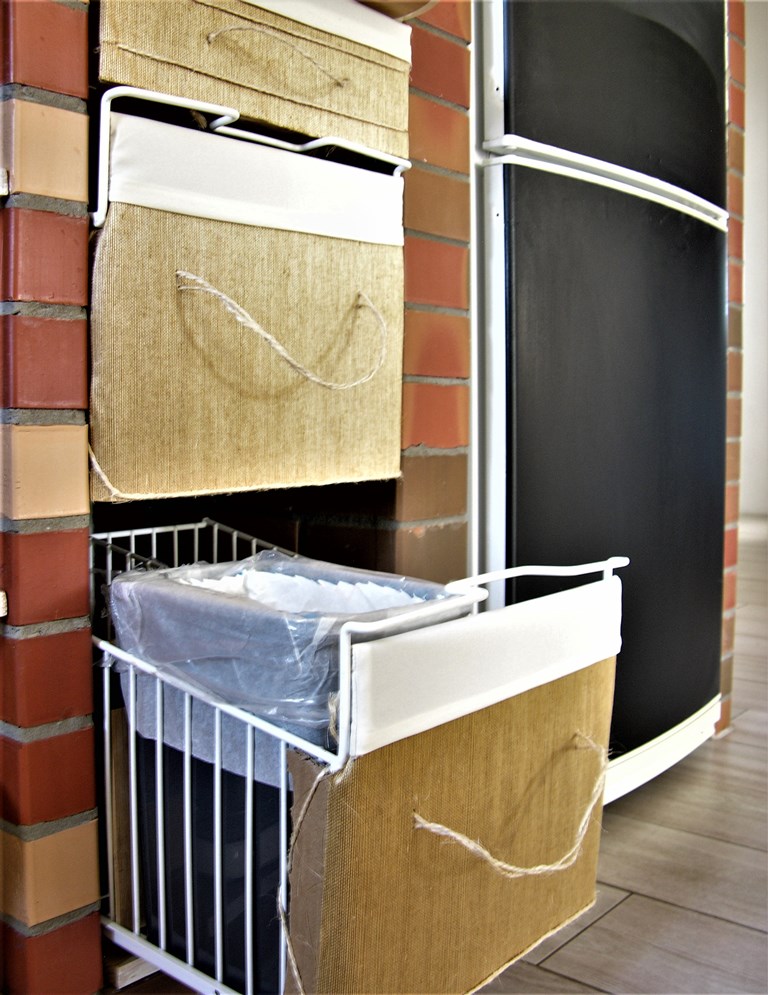
When you have a big family a chest freezer is a must-have. And it`s a big deal when it stops working all of a sudden. Not only because you have to decide where to put all that food (if you`re lucky and it hasn`t spoiled) but because you have to put somewhere that huge unappealing thing unless you decide what its upcoming destiny is going to be. Fortunately that wasn`t my problem. I just took advantage – the wire freezer baskets 😀 Mine are strong, snow-white, large and fit perfectly to one of our DIY kitchen cabinets` opening (yes, the cabinets you can see in the featured image, as well as here and here and here, is a DIY brick kitchen. Maybe some day I`ll write a post on how I made it.).
So now I just have to figure out, how to mount them onto the brick wall.
Euro drawer slides are what I`m using this time
European slides come in both 3/4 and full extension versions and are available in several colours. The rolling system uses nylon wheels, one wheel on each runner. Usually the slides are captive on the right side which means the wheel rolls in a groove and is kept in place side to side. The other side of the slide is free in case the shelf or the cabinet are not perfectly parallel to each other, it still can run easily in the runner. High quality 3/4 extension slides are very affordable while the full extension are quite pricey. We`ve got ¾ extension slides which are quite enough for these large (about 45 cm or 1′ 7″ deep) freezer baskets.
How to attach drawer slides to a basket
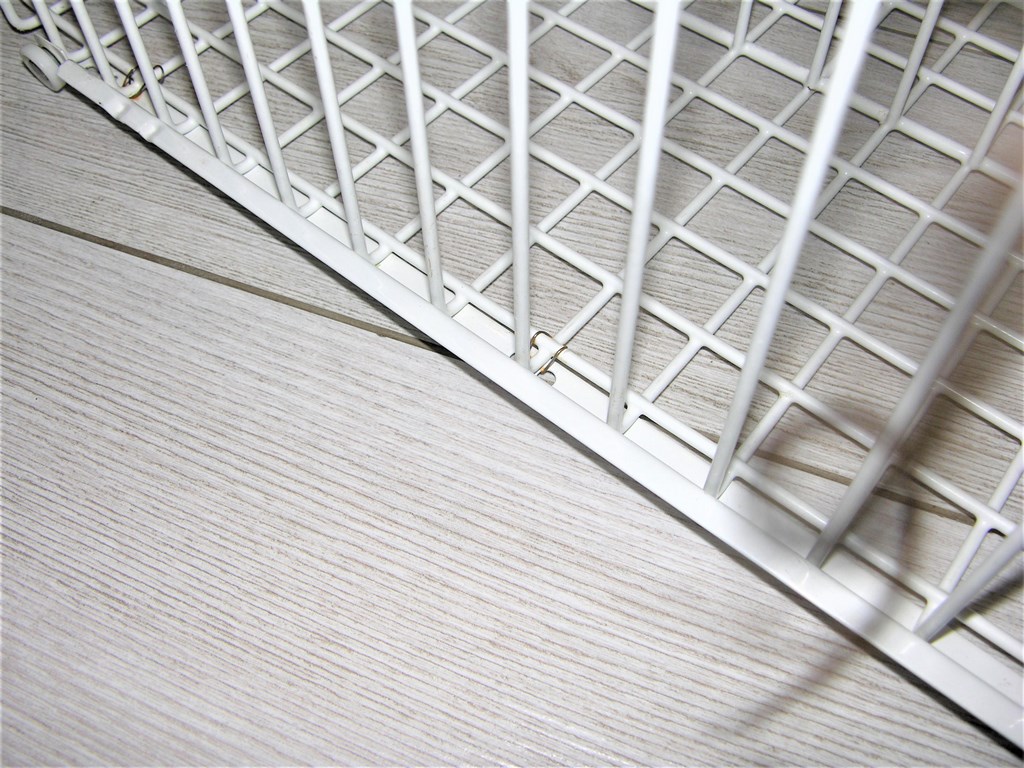
European slides wrap around the sides of the drawer (basket in our case) and make a wrap around support. This is essential because it`s way too hard to attach side-mount, ball-bearing slides to the wires of the basket. We could also use undermount slides, but they are way more expensive than the Euro stile or the side mount ones.
There are holes along the runner that is to attach to the basket. With the help of a steel 20 gauge galvanized wire and pliers, making loops and crumples I magically mounted that runner to the basket. No, really, that was the easiest part. Just make sure the ends of the wire are bent over the basket so they couldn’t prick or scratch something.

How to mount drawer slides on a brick wall
Yes, as I`ve mentioned before, our cabinet walls are made of bricks. And it`s a bit tricky to mount something on them, especially drawer slides.
Usually to screw into you need anchor screws ( walldog, concrete screw, screw anchor) and a masonry drill bit. The anchor screw looks like a regular screw but it also has an extra set of raised threads that help it cut and grip into very hard material like brick or concrete. I`ve never used them for such firm surfaces as brick or concrete, because I think their threads are not enough to stick hard in them.
The thing is that the holes in the slides assume screws with flat, countersunk head to be mounted flush with the steel to prevent any sticking or catching. Usually they`re mounted on wood or wood-based materials with 1 cm or 1/2″ screws. Bricks won`t hold those tiny screws, so we need larger ones, plus plastic anchors.

Frankly, I tried to mount them on the bricks, but the bricks are hollow inside and there`s just nothing to cling to for small anchors. Besides our cabinet walls are made of very thin 2-5/8″ (60 mm) bricks. So I prefer making holes in the mortar between the bricks, even if the mortar is not where the runners are to be mounted. The mortar is easier to drill into, it`s softer than brick and it holds the plastic straddling dowels much better.
Important: don`t use ordinary plastic anchors in drywall for heavy duty, it`s not safe.
Assuming it all, here`s a step-by-step instruction on How to mount a drawer slide on a brick wall from a person who lives in a brick house i.e. me 🙂
- Find anchors suitable for you at any hardware store (my choice is 1 3/16″ or 30mm).
- Get a drill (this is my favourite one) and set of masonry bits that match your screw size. Look for these at a hardware store if you don’t already have them. Use a drill bit that is slightly smaller than the width of the screws you are using, to ensure a snug fit.
- Take the wall-mount runner, fit it where it`s supposed to be attached to the wall (if you remember, I chose the mortar) and mark the holes of the runner on the mortar. Two – one on the front and one on the end of the runner – will be enough for 25lbs (10kg). Place a level on the line between the 2 marks to make sure that they are even.
- Drill the holes where you marked them. Watch the drill bit to be at a right angle to the wall, and work slowly. Drill slightly deeper than your anchors/screws length. Reverse the drill bit when you’re done to get it out of the wall. Use the vacuum to get the debris out of the hole and your way.
- Insert the small plastic anchor. You may need a mallet, but it doesn`t have to be very tight neither lose.
Tip: Once I needed very small anchors (about 1 cm or 1/2″ long and 3 mm or 1/8″ thick) but I had only 3 cm or 1 3/16″ long and 4,5 mm or 3/16″ thick anchors. I just cut one in two and hammered it into the hole (it was possible because these plastic anchors are split at one end and there`s a small gap between the split parts). Then I took a 2 mm or 5/64″ thick drill and made a little hole in plastic then drew the tiny 1cm or 1/2″ screw in. It`s a perfect support for very light (under 6lbs or 2-3 kg) drawers/shelves made on a brick wall.
- Put the runner on its place. Insert a screw into the anchor through the hole in the runner. Use a screwdriver attachment on your drill. The screw should not jiggle.
That`s it, the wall-mount runner is ready to accept the drawer-mount runner.
A trick to drill into the mortar only even if you need the drawer slides on the brick
The thing is that the wall for the built-in fridge was built on a different level apart from the level where the brick cabinet walls were built. So if I mount the slide on the mortar on one side, then the slide on the other side turns out to be on the brick anyways.
So I took a slat of thin 3/8 (10mm) OSB and mounted it on the wall, drilling in the mortar. It`s kind of a shelf that is playing the role of support to the drawer slides. Mounting it on the brick wall is the same as mounting the drawer slides alone, hooks or any other thing on the brick wall using plastic anchors. The hardest part was to level the two slides. When the slat is on the wall, you can attach the wall runner to it and to the wall with liquid nails. It won`t go anywhere because the weight of the drawers lifts it down not to the side.


Instead of OSB you can use other wood scraps, but I wouldn’t recommend plywood, because its layers can break apart.
The baskets` facade

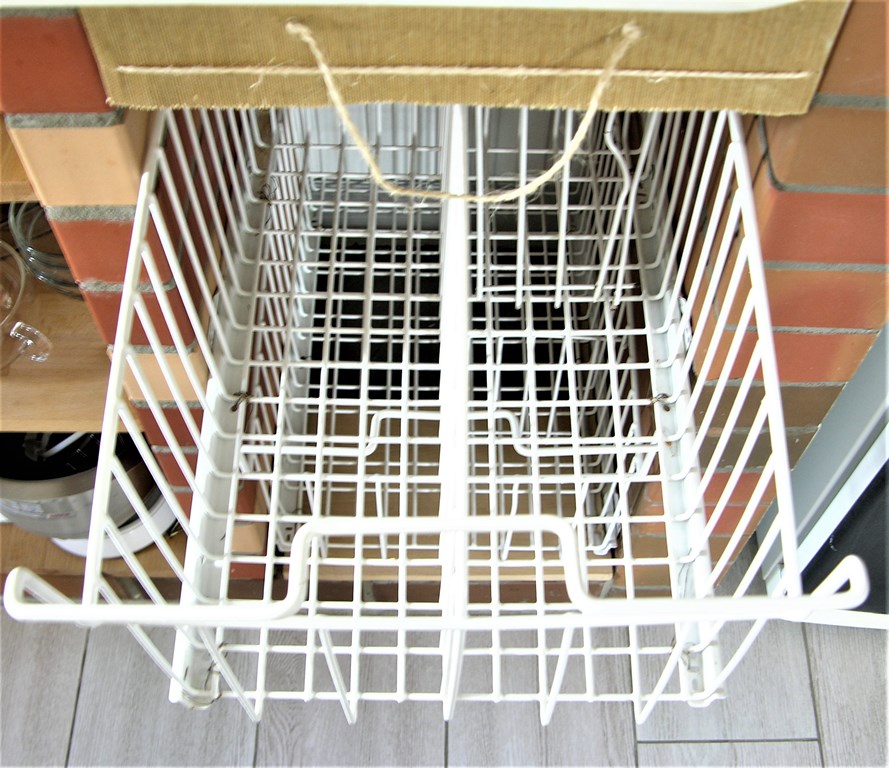
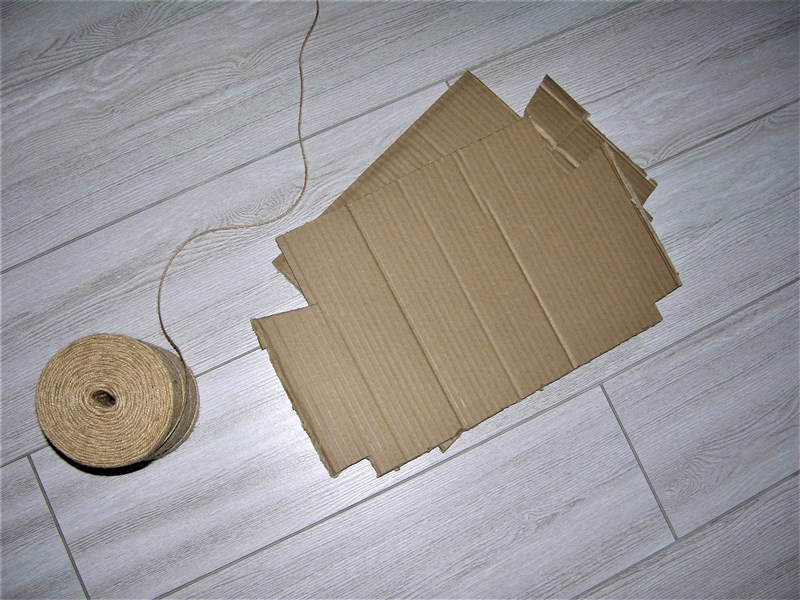
I like the way they look, but they don`t fit the look of the kitchen, besides everyone can see the mess inside 😮 The corrugated cardboard came very handy in here. I wrapped it around the front of the baskets and made cuts where needed. Then glued the grasscloth wallpapers (rests of another projects) on them and sewed linen for the tops.


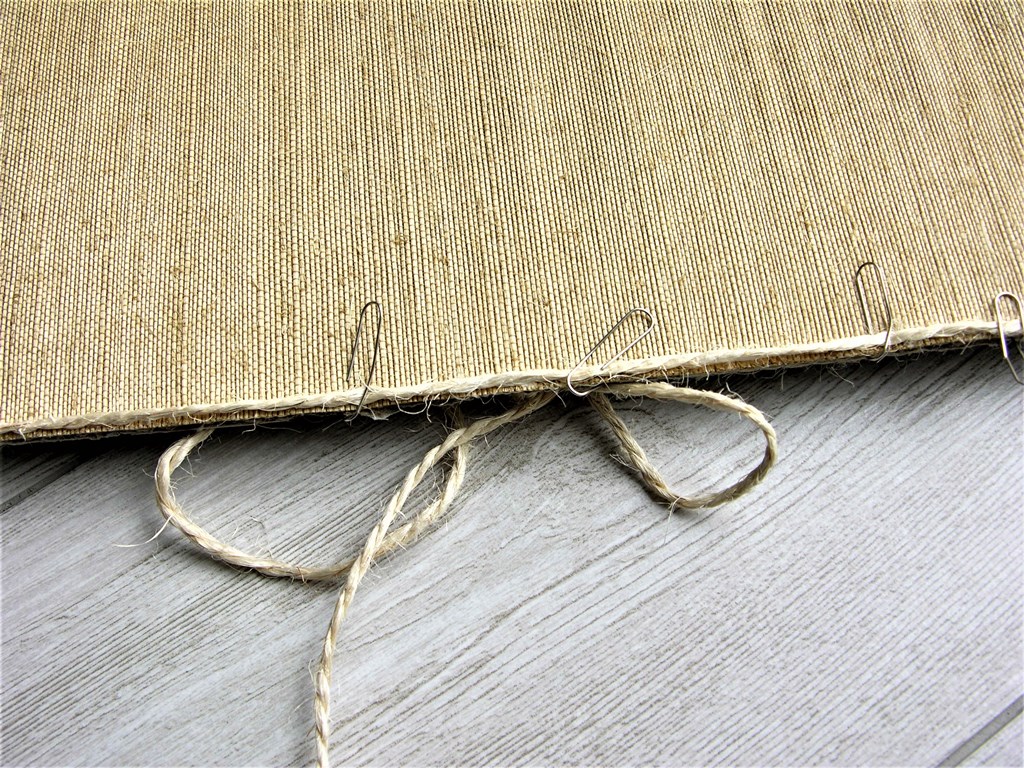
The facades are almost square, which frankly is so ugly, but I didn`t want the fillings to be seen so didn`t shorten them. Tried to use a visual trick with a 5/64″ (2mm) twin thread. Glued it to the lower edge of the cardboard with the carpenter`s glue and tied the ends of this thread to the basket. So, anytime we need to wash the baskets, we can take off this front board by simply untying it.
Also, made handles to make it similar to the cardboard boxes for vegetables on the other side of this 3 m or 6′ wide kitchen cabinet.
Handles
They weren`t actually necessary because the wire freezer baskets already have handles. But, for the sake of symmetry and better facades proportion they are here. So, the 5/64″ (2mm) thread and four 1/8″ (3mm) holes made with an appropriate drill bit (1/8″ again) in the cardboard.

Important: Always make the hole starting to drill from the front.
Although the hole we made for the thread is a bit larger it`s still very hard to pass it through this hole. We`re going to need a small triangle shape paper clip.
Unbend it in the middle. Then unbend the smaller part, pass it through the hole we made. Hook the thread by bending the clip back and pull the thread through the hole with this paper clip hook.

Make it with the two holes on the one side, then braid the two treads together and pass them through the two holes on the other side. You can tie them around the nearby wires of the basket.
I also made a drawer from plywood for the top of the cabinets and also decorated it with the grasscloth wallpapers.

Here`s what turned out:


I think if we want a cosy beautiful house but have a really microscopic budget (which is possible for sure!), before we throw stuff out, we should always think about how it might be re-purposed. What is your opinion on that?

For over 20 years, Sub Zero & Wolf Appliance Repair Chicago has been the company that homeowners in the Chicago area trust.