

These “temporary” veggie boxes had been serving faithfully for more than two years.


It`s unbelievable because they`re just corrugated cardboard boxes, namely simple boxes, wrapped in natural grasscloth wallpaper. Why grasscloth wallpaper? Because, you might have guessed – leftover 😀 My parents have a whole wall “wrapped” in this wallpaper. It looks fabulous! But there are two problems. First, there is no disjunction for different vegetables, we put them there in cellophane bags and they spoil fast although I leave the bags open. Second: these boxes don`t have drawer slides and we have to hold them when putting in or getting out the vegetables.

This post contains affiliate links. For more information, see my disclosures here.
How to make ball-bearing drawer slides for corrugated cardboard boxes hidden
The boxes were made to precisely fit the recesses, so when I tried to place the drawer slides in our brick kitchen cabinets, it turned out that they didn`t fit in. But the corrugated cardboard has two or more layers (that is why it is so firm) so I could make a cut in it and fit the slides in, so they are like hidden slides (which cost 3-10 times more than ordinary side-mount ball bearing slides we use).


Important: be very careful with the utility knife! Don`t cut yourself, cos I don`t want to be cursed by you if you do 😂
In the inner side of the box I glued an additional piece of cardboard along the slides to make it more reliable. You may purchase firm double wall corrugated cardboard sheets for this and projects like this by clicking here.
I tore the grasscloth wallpaper off the cut out piece and glued it back into the aperture. This made the cut a bit more appealing (you can see it in the penult picture of this post).
How to install ball-bearing drawer runners on brick cabinets
If you`ve been following me for a while, you know that our kitchen cabinets are built of brick. So there are a couple more complications with attaching ball-bearing drawer slides to the brick walls.
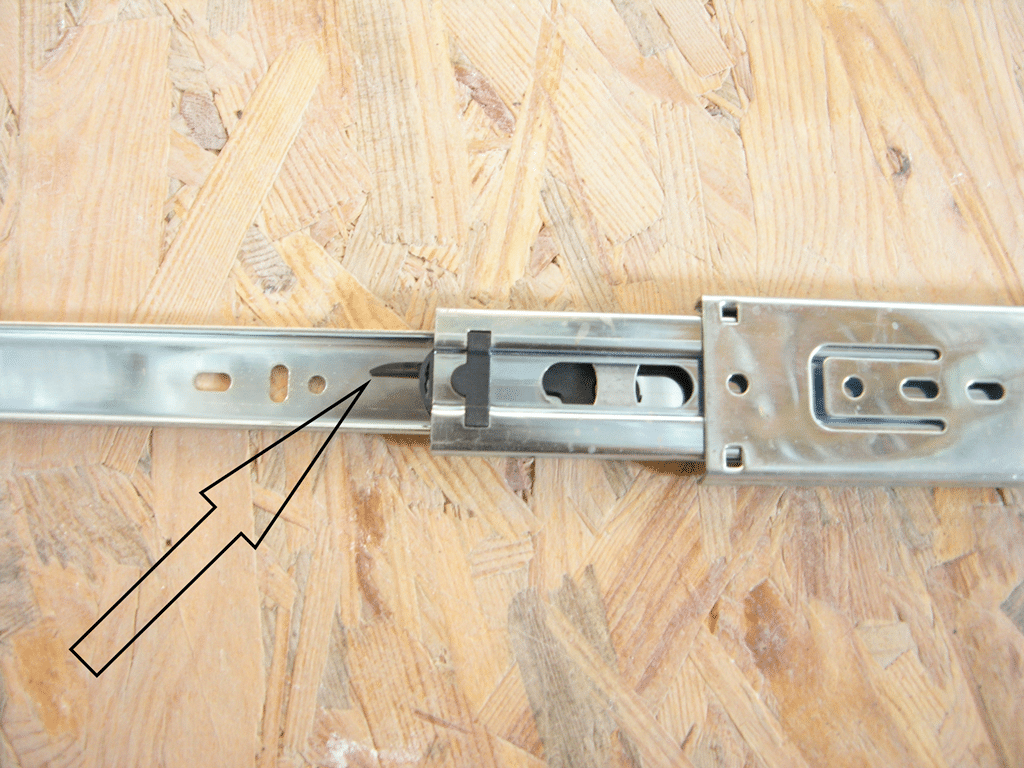
Before you mount the drawer slides on brick walls or any other surface, you need to separate them, so that one part can be mounted onto the side of your cabinet and the other onto your drawer (or cardboard box in this case).
There`s a small clip on the runners. Bend the clip to one side and you`ll release the top slider section – the side that gets mounted to our box.

Attach the slider onto the side of the cabinet with the screws along the length of the drawn line.
*You may have noticed that the cabinets I`m mounting to the runners are made of bricks, so it takes a bit longer to attach them properly. The full process of installing the ball-bearing drawer slides to the brick wall I`ll try to show you in one of the next posts.*


Make sure that the screws are mounted flush with the steel to prevent any sticking or catching.
Clip the sliders back together again.
Place the drawer/box into the opening, making sure that the cut we made sits properly on the slides. Pull out the runner for about 2″ (5 cm) and secure the front end of the runner to the box using 16mm screws on both sides.
Corrugated cardboard is firm but it`s not real wood, so the screws won`t sit tight on their place, so I made some kind of nut out of plastic (my son loves cars and he has couple of hundred car models; I didn`t throw away the plastic holders that held the cars within their boxes, they come in handy around the house). You can use appropriate bolts, nuts and washers.

Then I pulled the box out more to secure screws along both sides of the drawer. And then pulled out the box to finish off adding screws to its back. With the drawer runners attached along the length of both sides we can clip the drawer/box back into the side runners.
How to make a “partial” box liner
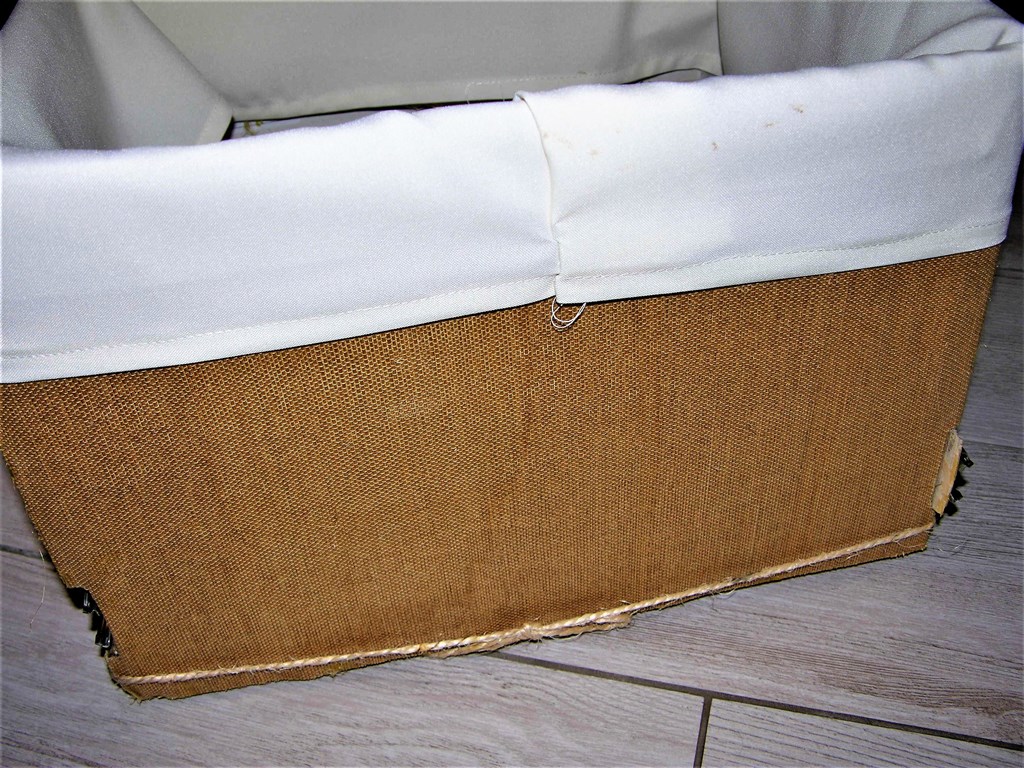
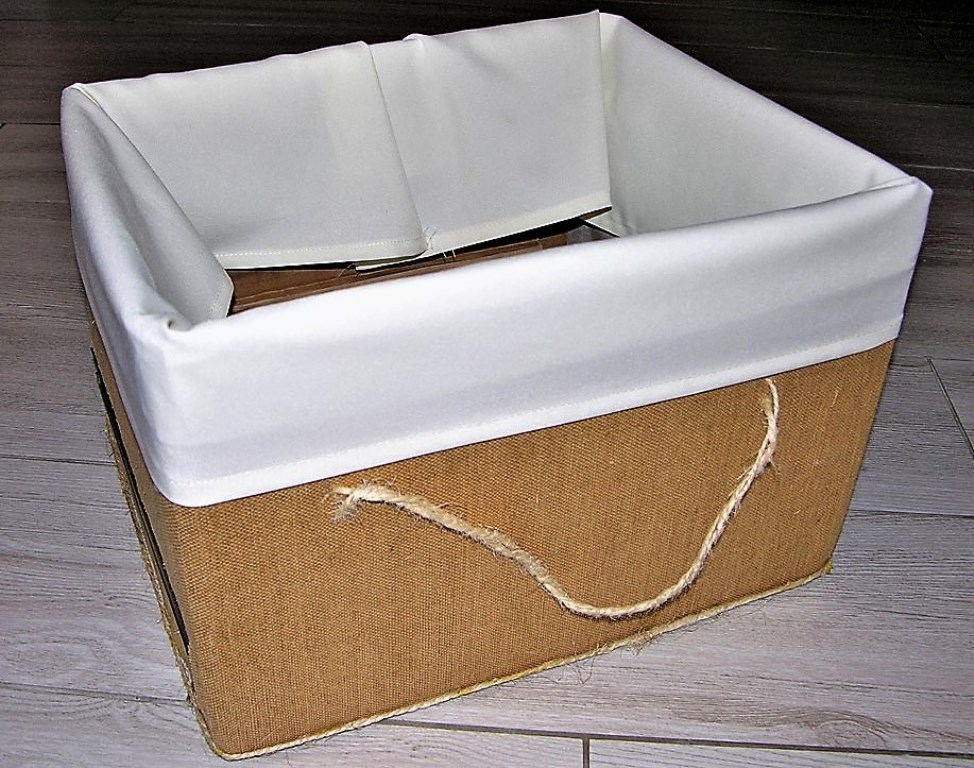
Who wouldn`t agree that basket liners make a difference?! I`ve already shown how to make a basket liner here. But in this case, I will not make a full cover. These boxes are supposed to store root vegetables which are often covered with dirt and soil, so white liners inside are a bad idea for sure. But outside they would give a little touch of chic.
Leftovers form the studio again 🙂 I cut out three stripes about 3/4′ (20 cm) wide (depending on the fold-over you want to make) and 5′ (150 cm) long (depending on the boxes` perimeters) each. Then sewed a ½″ (12 mm) double-fold hem on both sides along the stripes.


*Tip: to make the sewing easy for non-professionals like me, you can first iron the bent fabrics so it lays down flat and you won`t need to pin the hem in place.
When the sewing is done, iron the stripes. Then bend them around the box. Make it tight, pin and seam the free ends of the stripes for each box. You can use the sewing machine again, but I made it with hands, it was late night and I didn`t want to wake anyone up 😳


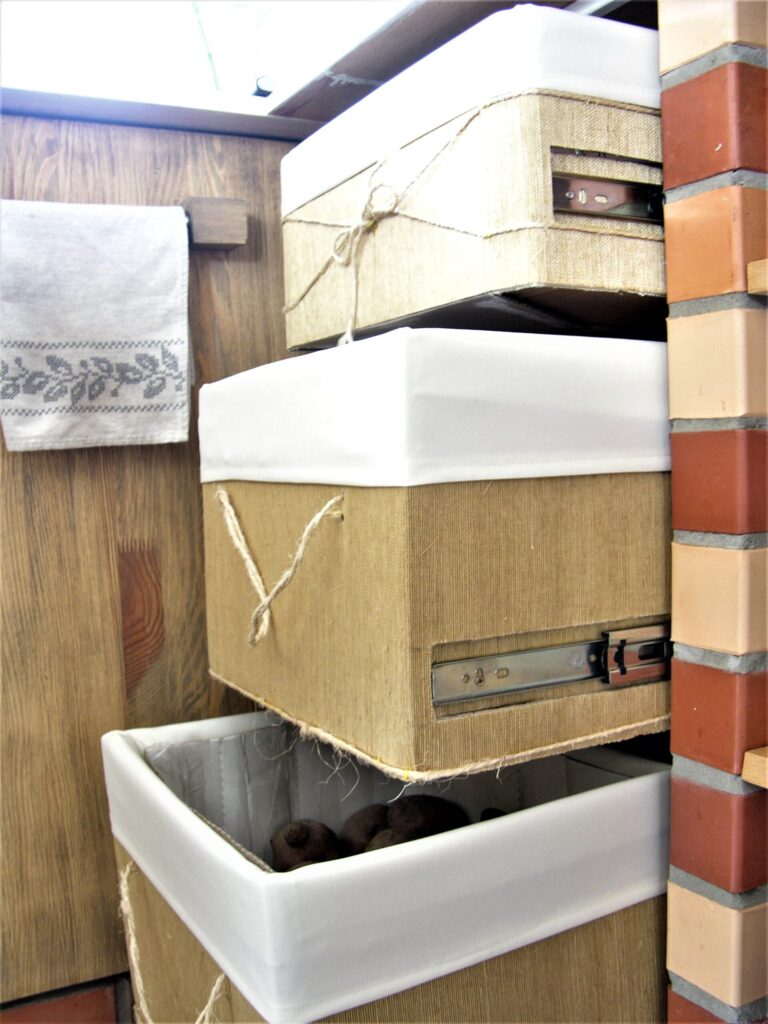
Inner boxes for root vegetables
If you buy washed vegetables/fruits or wash them right when you bring them home, they rot much faster, so it`s better to keep the soil on them and wash right before cooking. But in this case our fancy boxes soon become dirty, wet and eventually spoil quickly. So we need some inner boxes which could be easily cleaned, the dirt could be shaken out of them, or they could be easily replaced when had been damaged.

I made them from ordinary small cardboard boxes. These small boxes i covered with baking paper, because its smooth surface is easy to clean and still “breathing” and, because I can replace it anytime something goes wrong 😅
For the lower drawer I made a big box for potatoes (yeah, we are potato-lovers)😊 For the middle drawer I made three sections for other root vegetables and put a little box for garlic on the top of the largest section. In the upper drawer I keep spices.


Well, now it`s convenient. I hope this DIY cardboard drawers will work well and last long.
Here`s a colorful and healthy pin fo sharing which is caring 🙂

Would you make a drawer of cardboard? Would you ever make any piece of furniture of cardboard?

This DIY project is so creative and resourceful! I love how you repurposed corrugated cardboard and grasscloth wallpaper to make stylish and functional storage for vegetables. The hidden ball-bearing drawer slides are such a clever touch! It’s great how you thought through the details, like using smaller boxes for organization and baking paper for easy cleaning. The “partial” box liners add a nice aesthetic touch too. Definitely inspiring for anyone looking to combine sustainability with practicality. Would love to try this idea!
A good and informative post
I wanted to thank you for this great read!! I definitely enjoying every little bit of it I have you bookmarked to check out new stuff you post…