This post contains affiliate links. For more information, see my disclosures here.
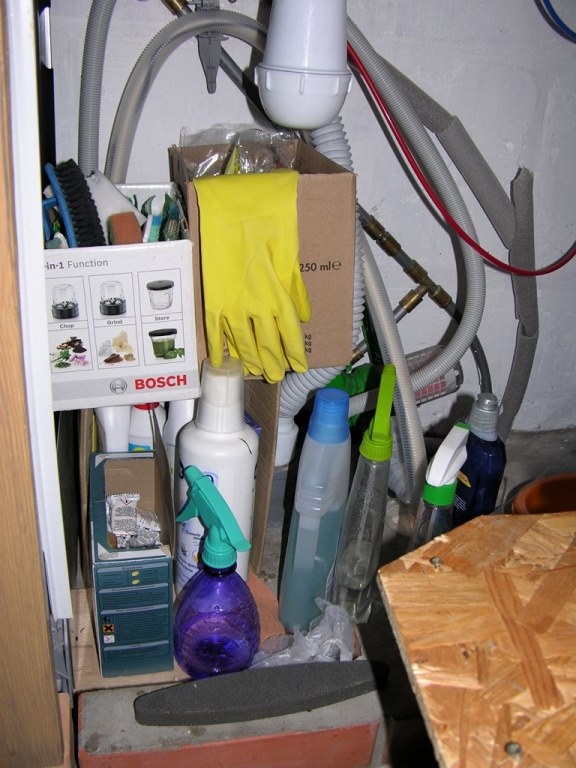
This mess was driving me crazy! It was so annoying to crawl to get some detergent! But when I bought a bottle of dishwashing liquid (which we hardly ever use) and found another one among that clutter, that was the final straw!

Our custom handmade cabinets are slightly deeper than the standard ones. In addition, there`s the empty corner cabinet space – so much unused space! Which is such a waste in a tiny kitchen! So I started to brainstorm the solutions and found tons of corner cabinet ideas, but, as ever, none of them was our case. Maybe that was because we had to fill this space with a drinking water filter, the dishwasher water filter, rubbish bins and an organized storage – all easily accessible 😯
This post contains affiliate links. For more information, see my disclosures here.
Factory-made door mounted waste bins
Though, there were a couple of interesting solutions for door mounted built-in garbage bins:


But the size and the price didn`t quite suit us. . .
Materials
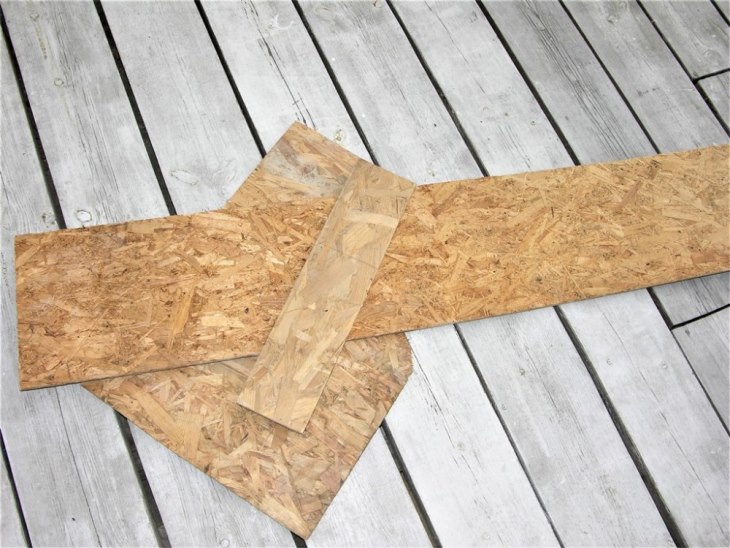
I was up to this project right when the quarantine started. So, I had to use what we had at home. In particular, a peace of a thin (1 cm) OSB board (you can use plywood of the same or a bit bigger thickness), a pair of 60 cm (24″) euro drawer slides, a pair of 4 cm (1 1/2″) folding hinge, some turquoise paint, tiny 1 cm screws and, of course, the sound panels wood.

A place for rubbish 🙂
Trash bin
We already had a large swing top bin for garbage (there`s not much of it, because we try to live ecologically and have another place for the recyclable waste).
Kitchen waste bucket
We also had a large swing top bin for organic waste. But it was inconvenient.
First, if there`s a pile of food waste indoors, it starts to rot, smells bad and attracts fruit flies.
Second, it`s heavy (it matters because we`re going to mount the bins on the cabinet door).
So, I needed a small and thin container.
We had several (1/2 gal or 2,5 L) oval paint buckets. I tried to fit one under the sink, next to the large garbage bin, and it fit perfectly 😀 I just had to get the sticky label off the bucket. Which turned out to be kind of a challenge, because it didn`t come off with water.
So, first water, then white spirit (paint thinner) with a scrub sponge.


Cute and free! bucket for compostable kitchen waste.
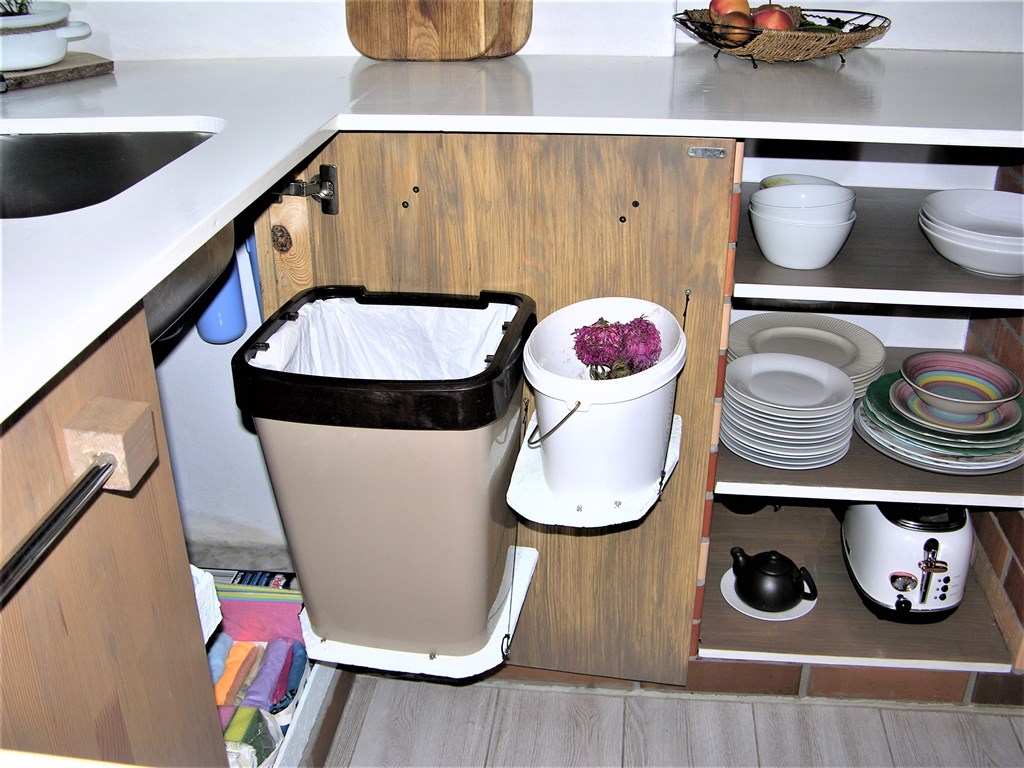
Cabinet door mounted trash can
Yes, I decided to mount the rubbish bins to the cabinet door. But as we needed to have an easy access to the drinking water filter in the corner, I had to make something easily removable. The only thing that came to my mind was to make two folding shelves for the bins.
Folding shelves
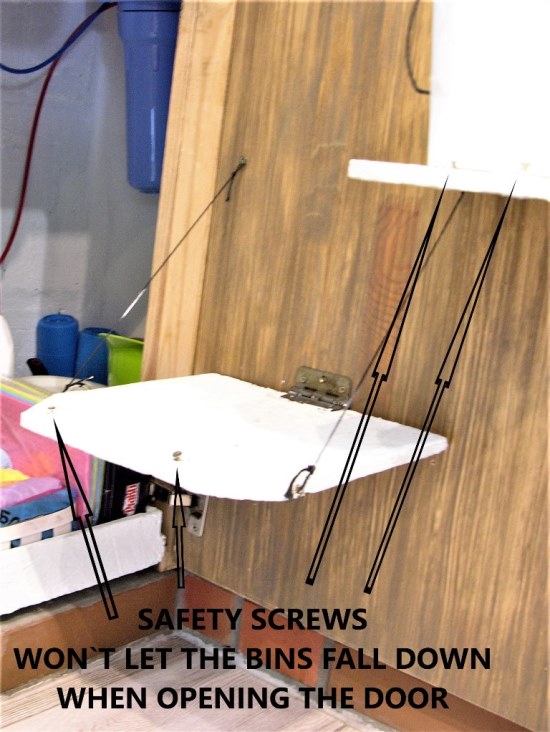
I cut out two custom shaped but appropriately scaled to the bins` sizes boards from the OSB (plywood). Measured the bins` height to place them under the sink and made two folding shelves to support the bins. Just attached the boards to the cabinet door by two folding hinges that I had found at home.
To hold the shelves, I screwed the same tiny (1 cm) screws into the cabinet door and into the edges of the boards: one for the small bucket; and two, on the both sides for the large garbage bin.


Then I took a 2mm string that doesn`t stretch (hubby is an eager angler, so he`s got a lot of that stuff), cut the lengths I needed between the screws (3 strings) + about 10 cm (4″) additionally, and made a tight overhand loop on one side. Hung those loops on the door screws and made loops on other ends to attach the strings to the screws in the boards. The job is a bit tricky, and you`ll more likely to redo it several times (I did this about 7 or 8 times to tie them to size).
Tip: the “looped” string should be a bit shorter than needed because it will stretch when the knot tightens under weight.
I screwed several tiny safety screws along the perimeter of the boards so the bins don`t fall when opening the cabinet door. And painted these boards.

Easy access to the drinking water filter and the dishwasher water filter in the corner of the cabinets
To get to the filters so I could service them, I just take off the bins and fold up the shelves. Somehow they cling to each other and hold each other in this position, so I can easily deal with the filters! 😆

I wish we had a white large garbage bin instead of this brown one, but it doesn`t look so bad, and on top of it – this project didn`t cost us a dime 🙂

Please feel free to comment on this idea!
Read the next post to see the rest under sink items organization.


Good luck 🙂