

These lights are those I didn`t take much picture of while making them, unfortunately. But it was super easy to make DIY pendant lights so you can easily figure it out by the present pictures. It took me about 2 whole days and 50$ to make it. While the whole process from making up the design to installing took about a year or more.
Weathered wood beams
After the construction of our house, lots of different woods were left, including the pine beams. So when I finally had the clear picture of the lamp in my mind I cut one of them into two 80 cm (2 5/8′) pieces and left them outdoors for the fall and winter so the rain and snow could give them a true weather “touch”. Yes, they were naturally weathered, and by the spring I had a beautiful material to work with.
*Important: the beams should be left in an open ventilated space so they do not rot.
Then I brought them indoors and let them dry for a couple of days.

In the picture you can see the untreated beam above and the sanded beam below. The wood became much harder and got a perfect walnut shade all through the bar. In another project I also experimented with natural wood stains, it turned out to be quite interesting 🙂
Notches in the beams for the electrical supplies
First, I sanded all the sides of the beams with a sander like this. Then made three holes for the lamps in each bar with a router like this, using this bit (as an alternative for beginners one can use a simple drill with an appropriate bit. It would be much trickier but possible, level Super Hard on hard woods). The holes should be deep so there`s enough space for the bulb holder, built-in lamp and LED lamps driver (a plastic box of appx. 20x30x600 mm where medium and high Voltage alternating current converts to lower Voltage direct current) and their ventilation.
Ventilation holes
Light bulbs can get extremely hot, while LED lamps barely get hot, but their drivers do. That is why it is important to make ventilation holes in the beams. For the Driver ventilation and for the cables I made two through holes for each lamp (6 holes altogether). With a circular saw I made a cut which matches these holes to fit the wire there. And finally grinded the whole surface.

I haven`t covered the bars at all just polished them thoroughly to get them very smooth, because the wood became so hard that now it`s even moisture resistant and I can easily wipe it with a wet cloth.
Installing the lights into the wooden beams
I made these lamps at the beginning of 2019 when had no idea that I would have shared this with someone, so unfortunately I don’t have pictures with the holes for the LED lights. I bought these lights, at that time they were a bit cheaper – 50$ for a pack of 6; on the Amazon page of the product you can find a video tutorial on how to connect these lights. I can assure you that I did my best while working with the router to perfectly fit those lamps (and drivers) into these bars. The holes for the lights are a bit smaller than the LED lights, so after connecting all the wires I needed a mallet to put them to their place. Made a parallel connection of the lamps, so if one of them is out of order, the others still work.
Attaching the bars to the wooden beams
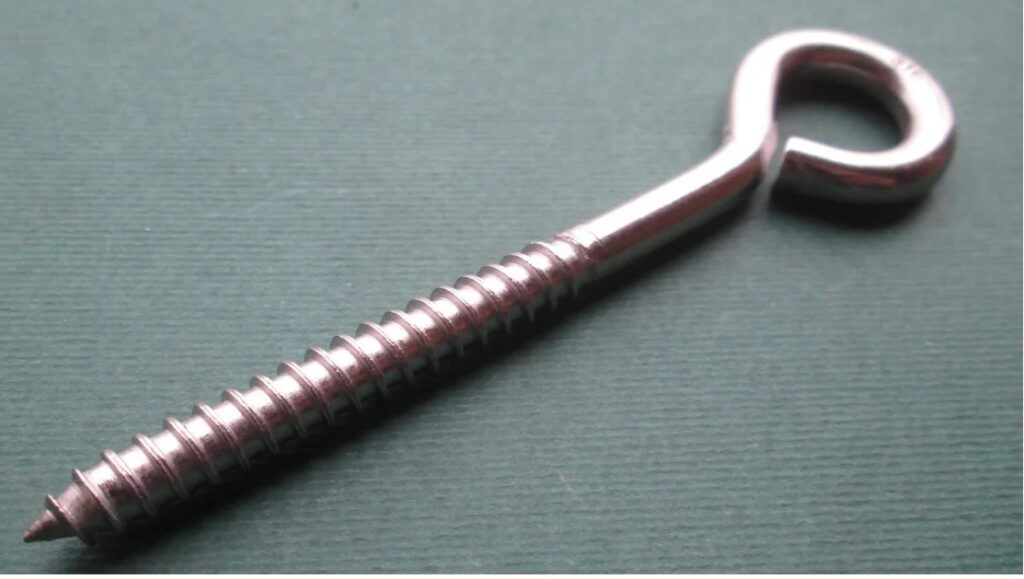
Our ceiling beams are 20 cm (approx. 7 ½″) thick. So I made two 10 cm (4″) deep holes from beneath in each ceiling beam and in each lamp for total 8 eye hooks. Generously spread the wood glue all over the hooks` surface (except of the rings), and screwed them into the beams and bars (eight 10 cm hooks altogether).
DIY adjustable pendant lights
As these lights supposed to be right above the dining table, I wanted to have an opportunity to lift them up or lower when necessary.

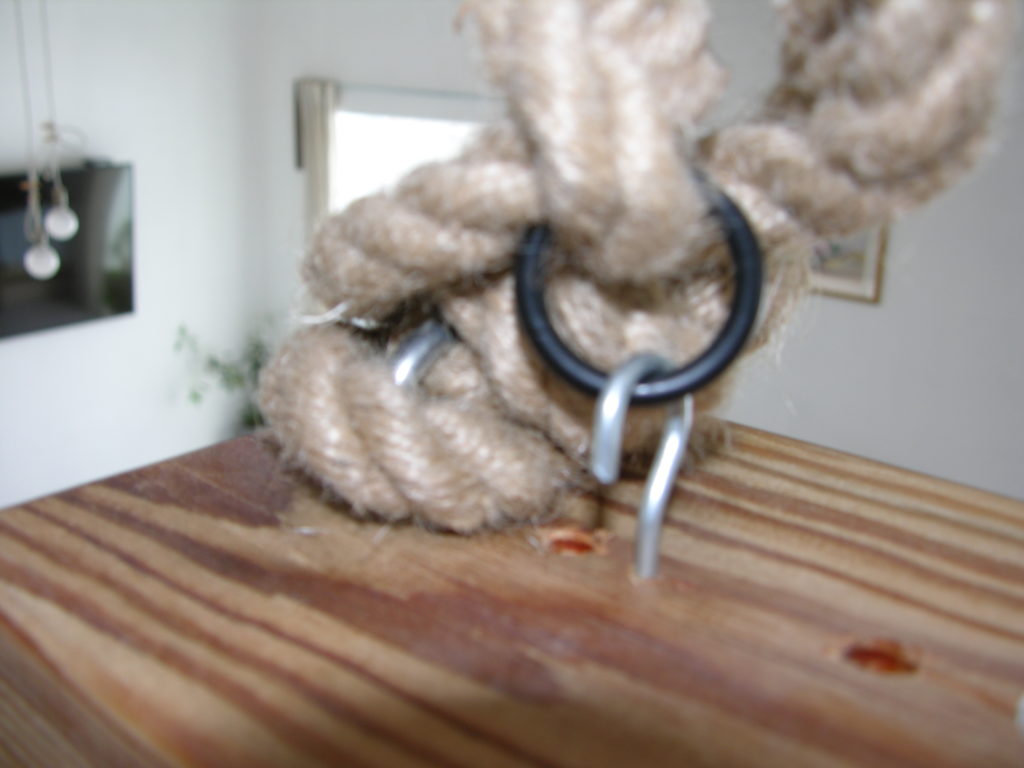
The ceiling in the dining room is 3 m (10′) high, so I decided to make three positions with the help of four pieces of 2 m (7′) long hemp rope (8m or 27′). The upper position – when more light needed (the light is the most effective when it is right under the ceiling). The middle position – when there`s no dining table, so we could walk beneath the lamp. And the lower position – right above the dining table, to give some intimate vibes to the dinner. The lowest position is 1,5 m (5′) high to illuminate the table, not the people around, but at the same time its high enough to see people who is sitting at the table, meaning it doesn`t disturb the view.
To accomplish this idea I tied the rope to the hook screwed in the ceiling beam, and fed it through a metal ring while making a knot, so I could fix that ring with the knot. That`s the upper position.

Then made another knot with a ring pulling down about 60 cm (2′) for the middle position.
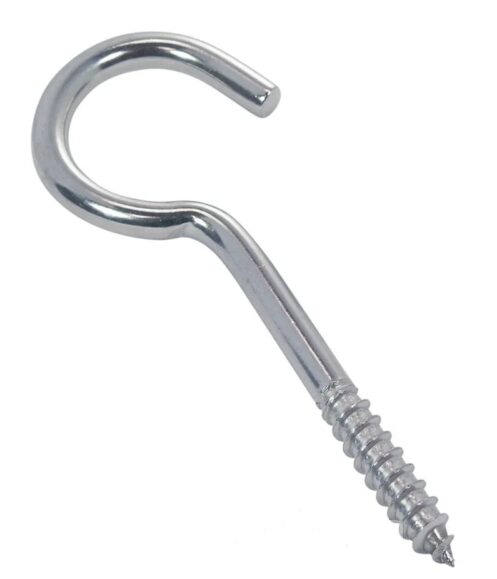
To hang the bars on those little iron rings I screwed two other smaller (7 cm or 3″ long) hooks into the bar, previously also making holes for them with a drill and pouring glue into these holes.
And finally, pulling down about 70 cm (2 1/3′) I tied this rope to the hook on the bar.
Electrical connection
When constructing the house I worked out a very detailed electrical plan and of course I knew where and what kind of lamps we would have in the future. So the lamp wires were already there – there was a through hole made through the 20 cm (7 7/8″) thick ceiling beam. I just had to connect the LED lamps wires to them with the help of such little connectors.
It`s really easy. As there are lots of different decorative wires nowadays, I decided not to hide them, but to braid them around the ropes. So for each bar I attached 2 decorative wires to the output wire, braided them around the ropes and attached them to the wires coming out of the LED lamps.

DIY Pendant lights – swing
The final step was to check the DIY pendant lights reliability, because two 9 kg (20 lbs.) bars are going to hang over our heads. So I had a little ride on it (it was really fun to swing IN the room, not somewhere outside) and the wooden pendant lamp officially passed the test.
And it`s also a quite acceptable idea on:


I absolutely LOVE this project. They look fantastic! Very creative!
Aww, that`s very kind of you! Thanks 🙂